Contents
- 1 Step 1: Access the Chatbot Flow Builder
- 2 Step 2: Choose a Pre-made Template or Start from Scratch
- 3 Step 3: Define Chatbot Flow Information
- 4 Step 4: Configure Chatbot Flow Messages
- 5 Step 5: Add More Messages
- 6 Step 6: Customize the Flow End
- 7 Step 7: Review Your Chatbot Flow List
- 8 Step 8: Test the WhatsApp Chatbot
Step 1: Access the Chatbot Flow Builder
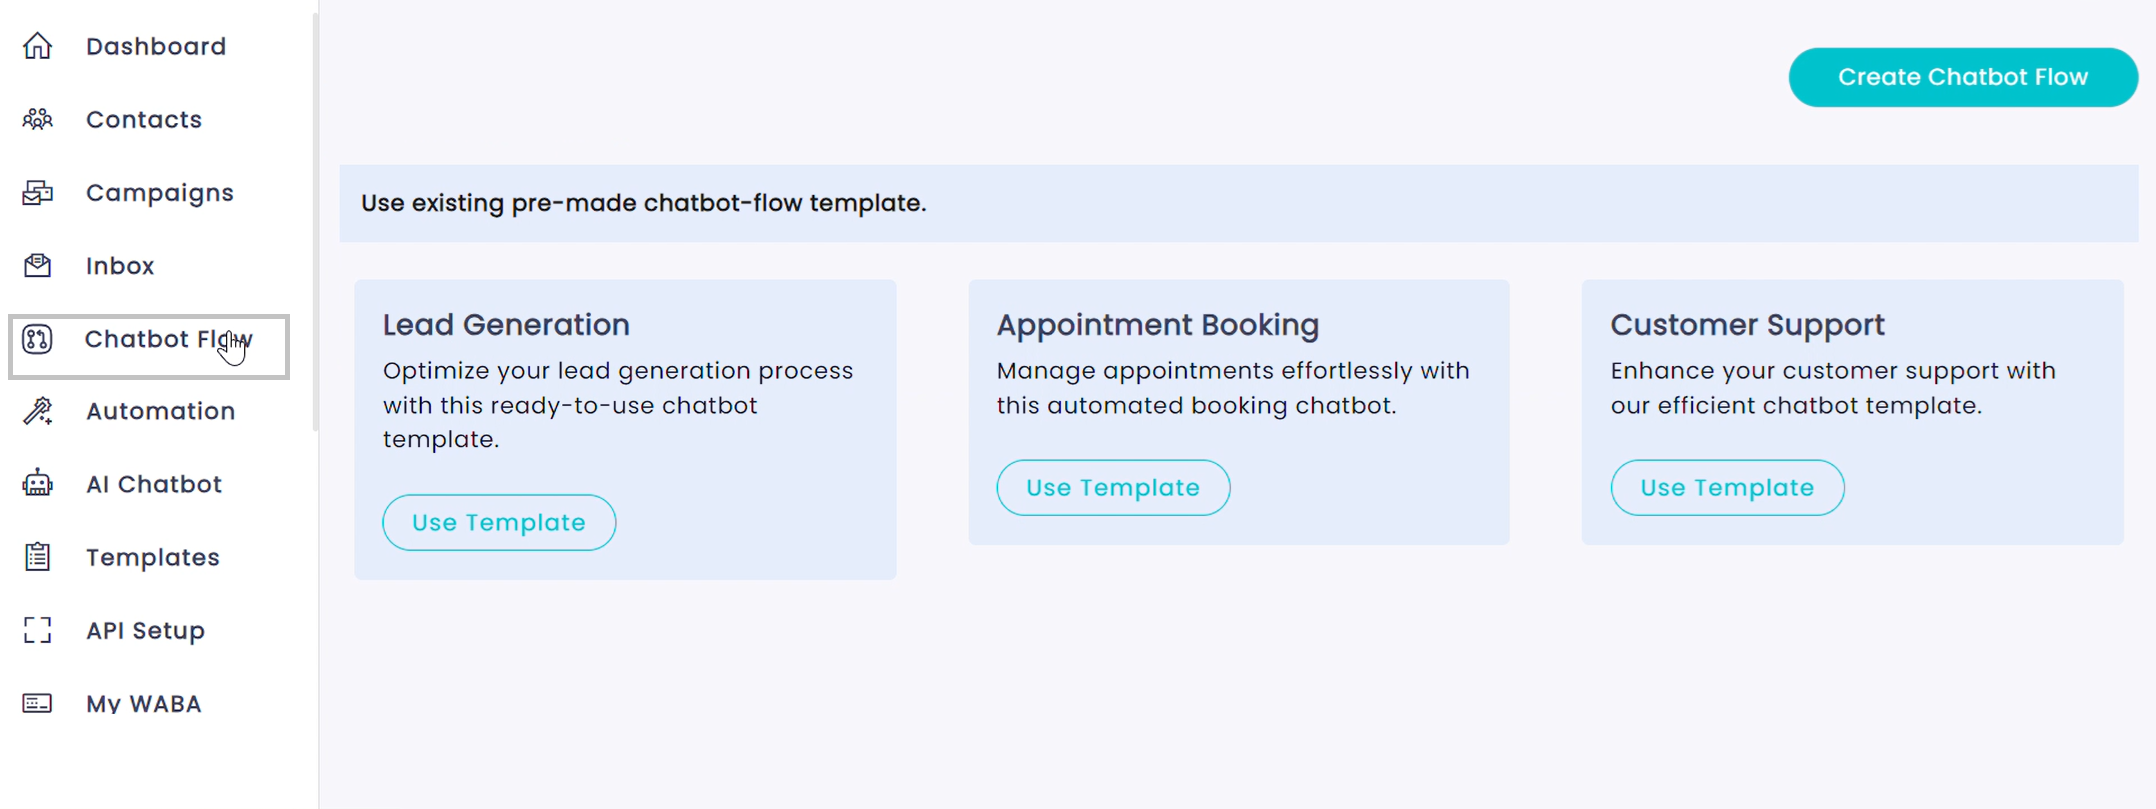
From your dashboard, navigate to the Chatbot Flow section located on the left-hand side menu (as shown in the first image).
Click on Create Chatbot Flow in the top right corner.
Step 2: Choose a Pre-made Template or Start from Scratch
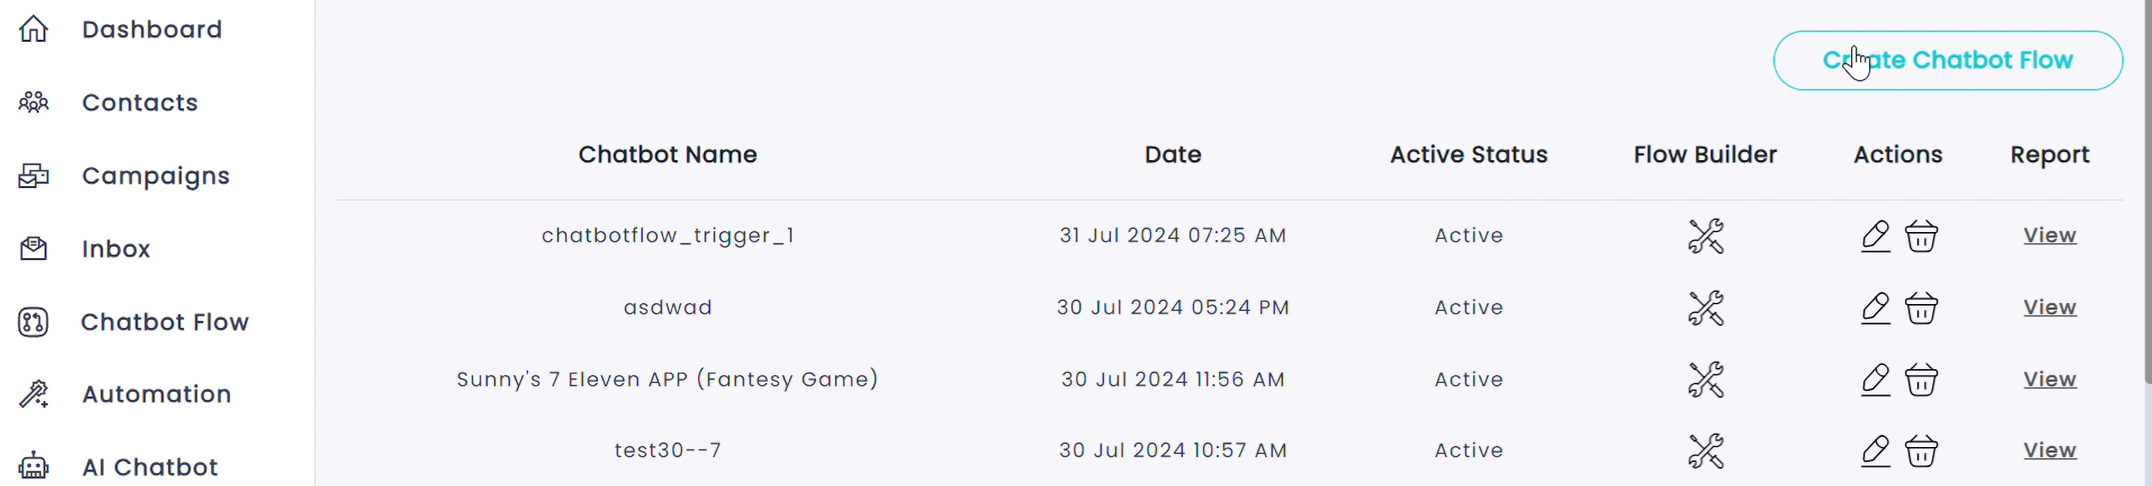
You can either select one of the pre-made templates (e.g., Lead Generation, Appointment Booking, or Customer Support) or click on Create Chatbot Flow to start from scratch.
In this tutorial, we’ll demonstrate how to create a new chatbot flow from scratch (as shown in the second image).
Step 3: Define Chatbot Flow Information
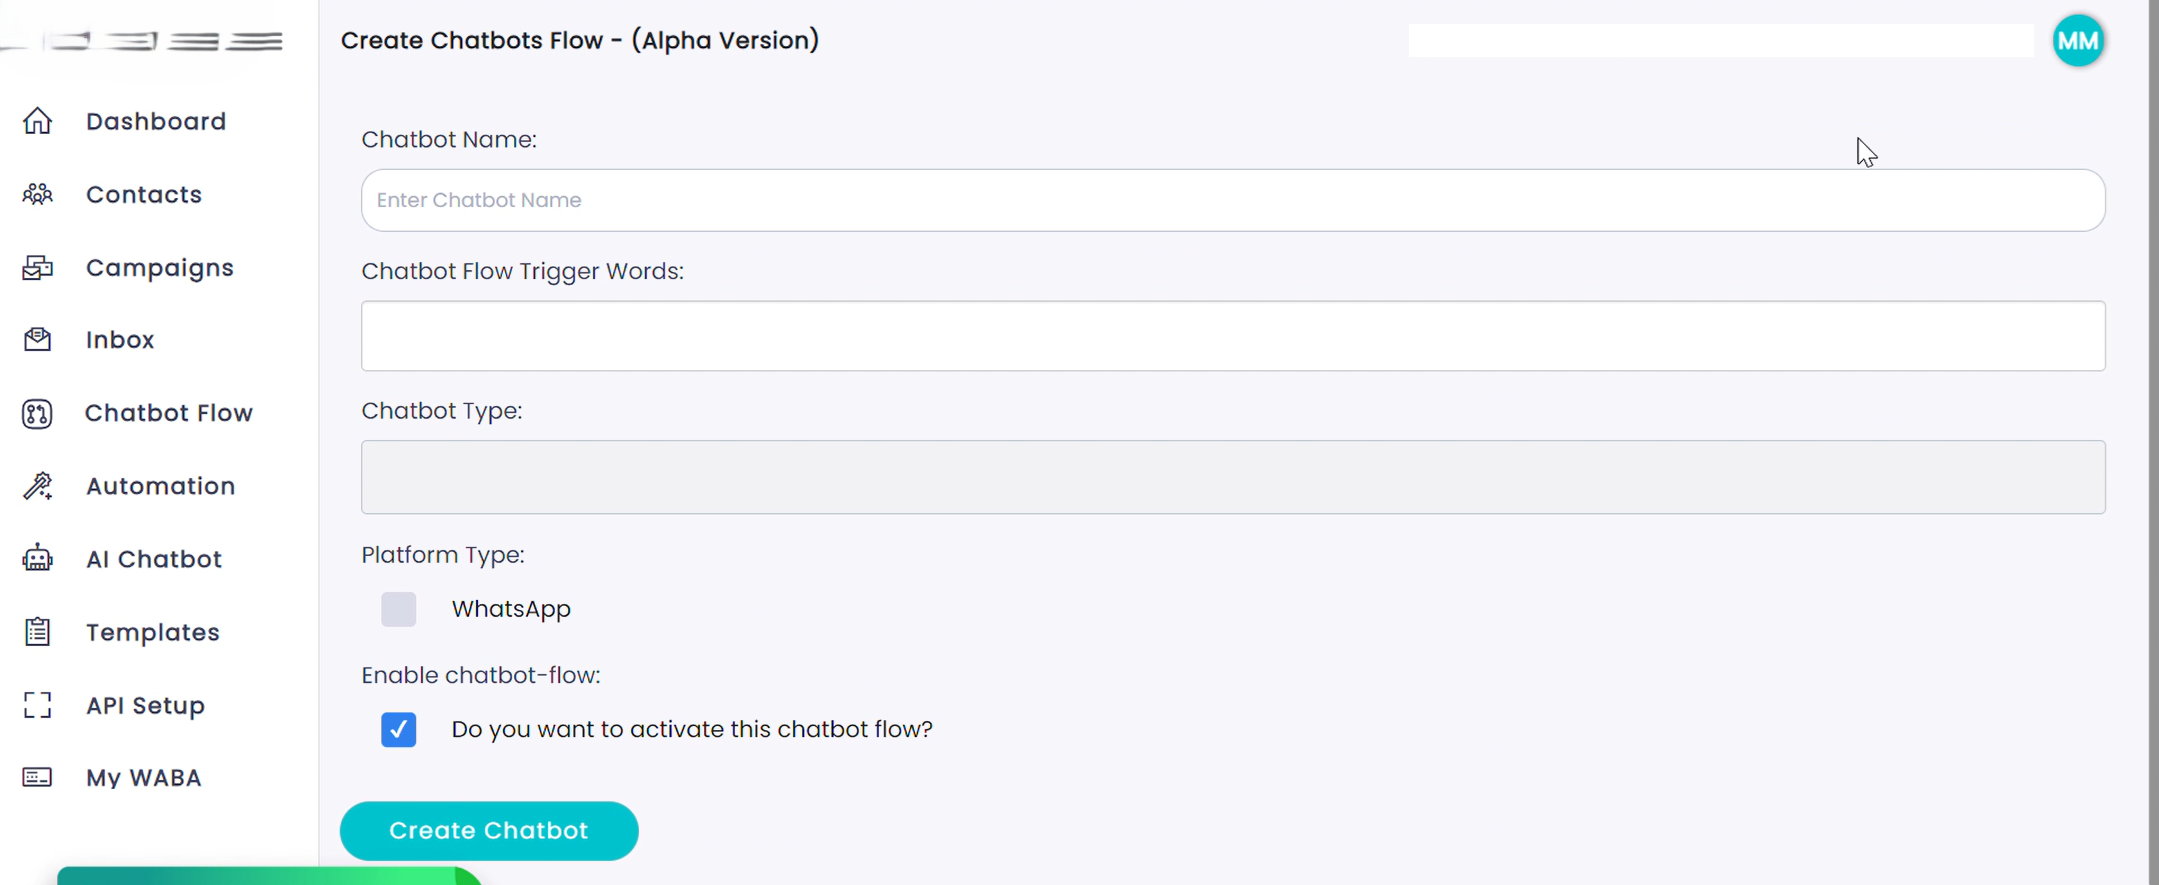
Enter the Chatbot Name, Trigger Words (which will activate the flow), and the Chatbot Type (e.g., Lead Generation).
Choose the Platform Type. Since this is a WhatsApp chatbot, check the WhatsApp option.

Link your WhatsApp number by selecting and inputting the number from the list.
Enable the flow by checking the Activate Chatbot Flow box and click on Create Chatbot (as shown in images 3 and 4).
Step 4: Configure Chatbot Flow Messages
Now that your flow is created, it’s time to configure the individual messages.
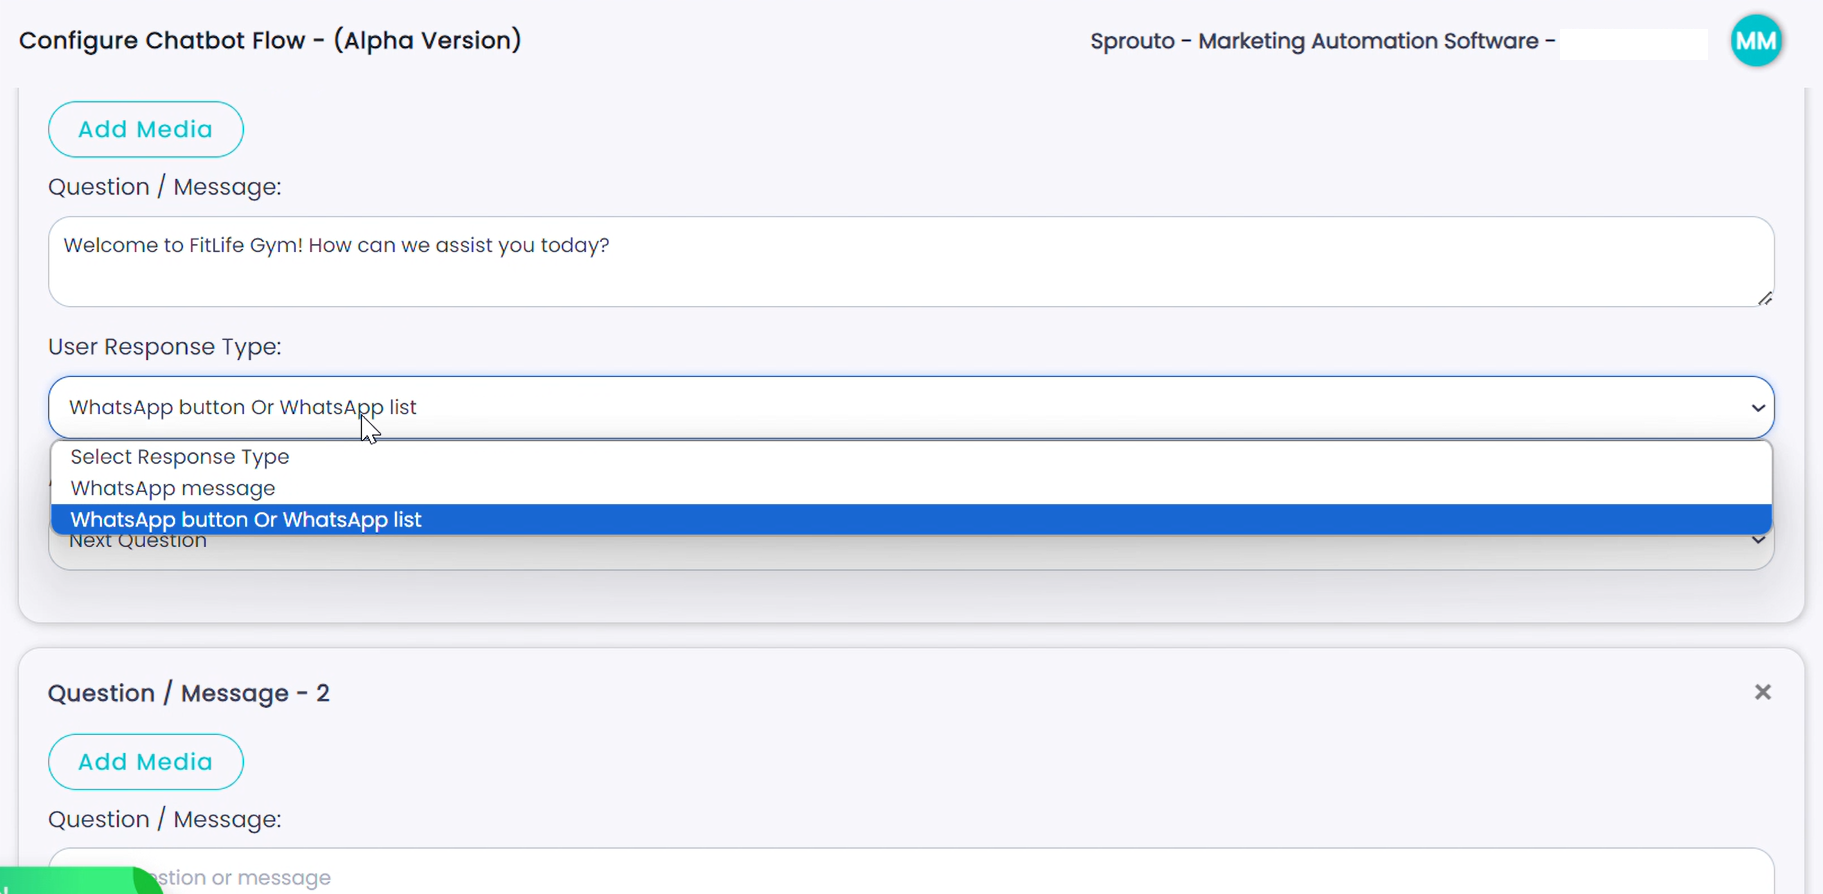
Start by entering the first question or message (for example, “Welcome to FitLife Gym! How can we assist you today?”).
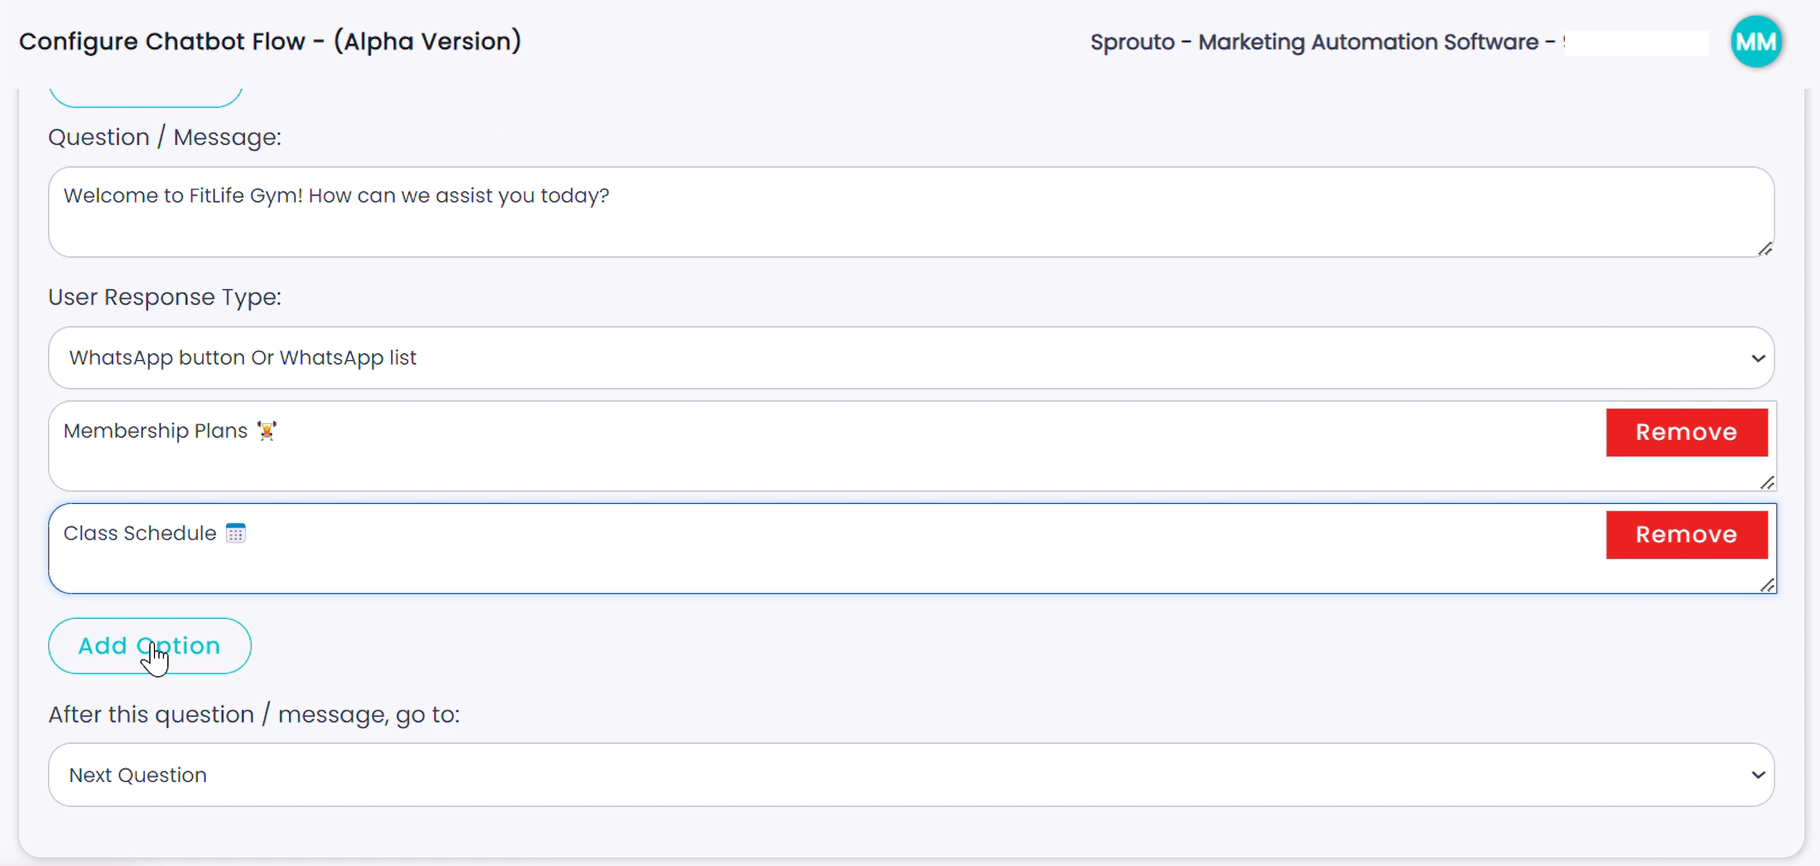
Select the User Response Type, which could be a WhatsApp message or WhatsApp button/list. In this example, we’re using buttons for options like Membership Plans and Class Schedule.
Add multiple options for users to select by clicking on Add Option for each new choice.
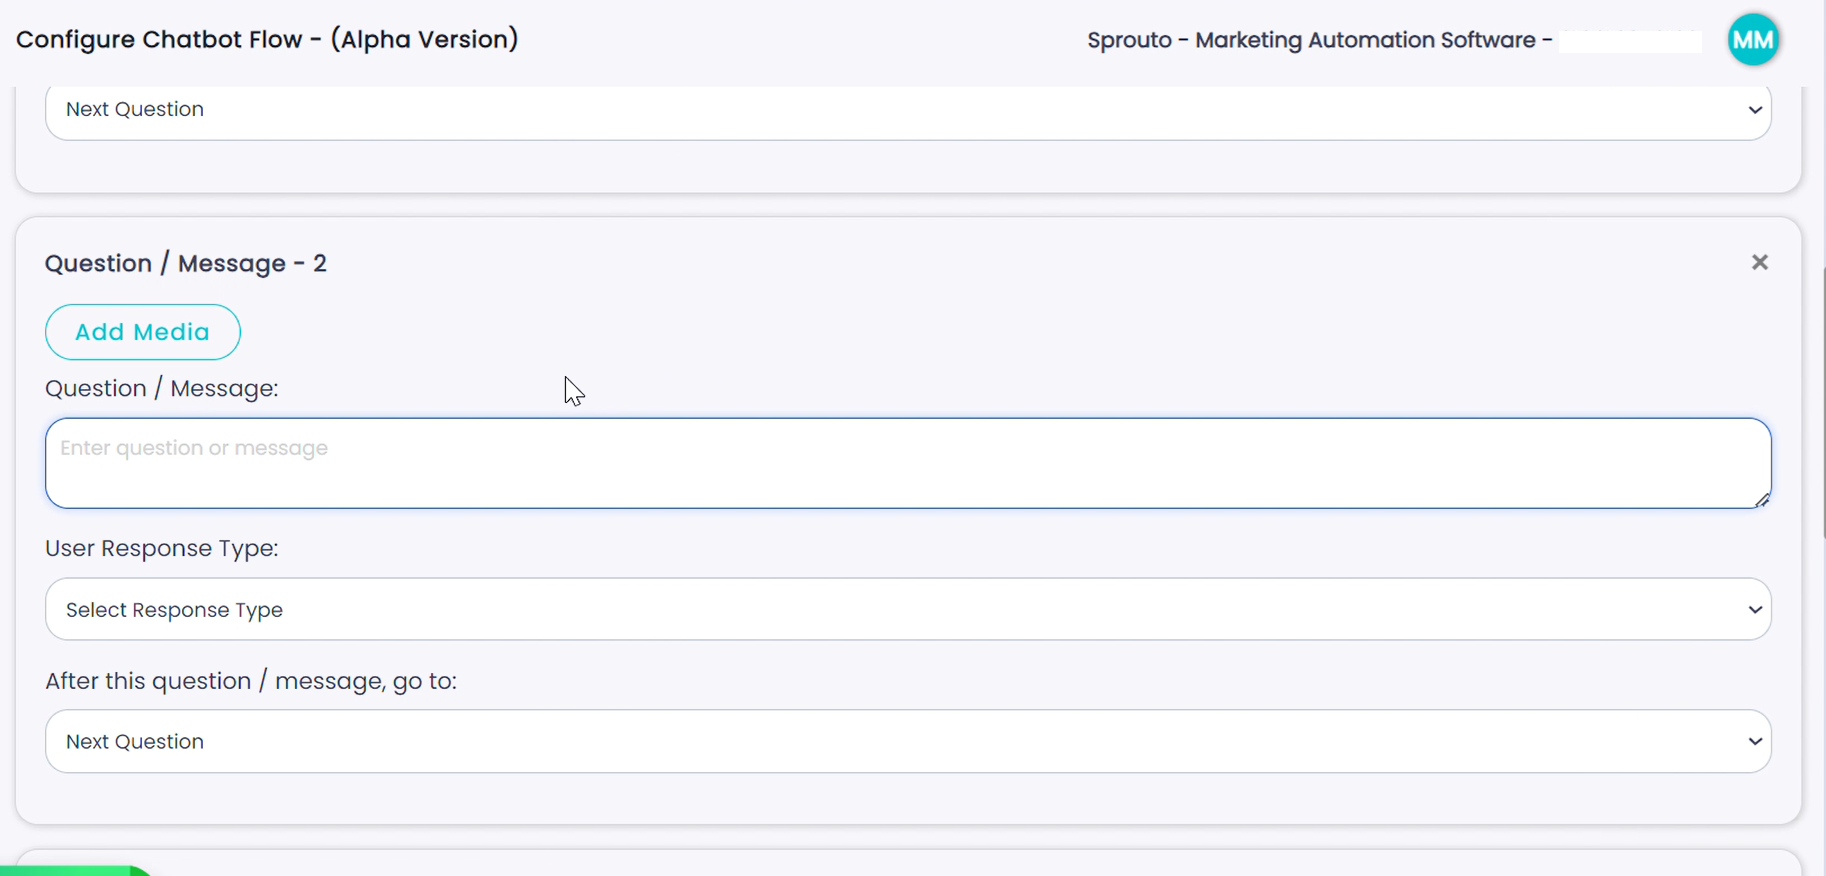
Step 5: Add More Messages
Add the next set of questions or messages based on user responses.
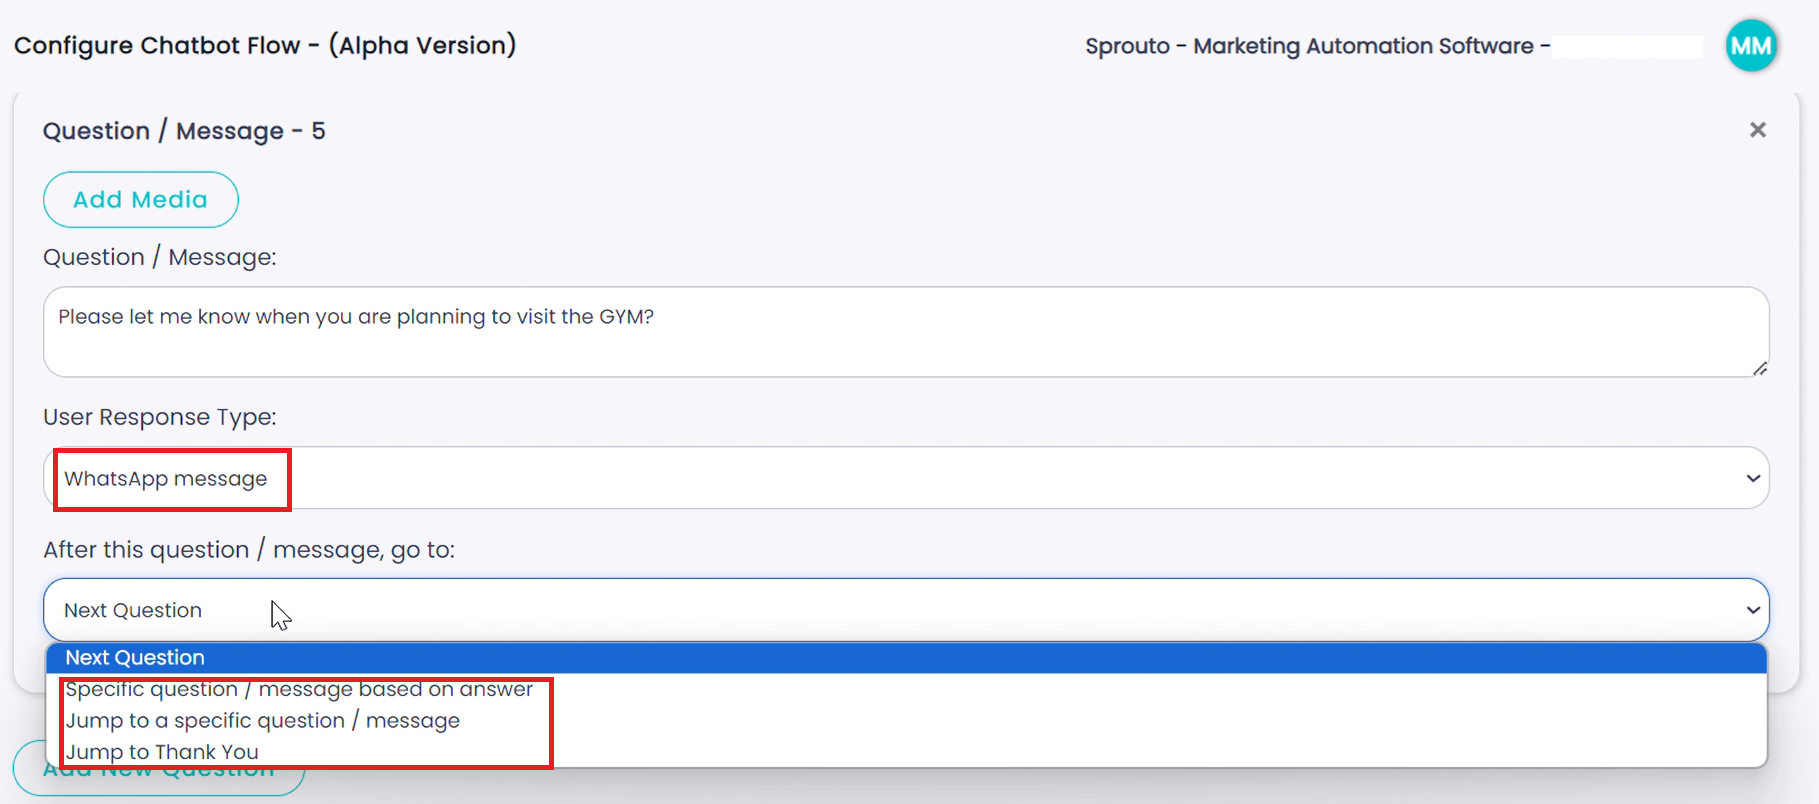
For each question, you can define what happens after the response (e.g., Next Question, Jump to a specific question, or Thank You).
For instance, you might ask, “Please let me know when you plan to visit the gym,” and the user’s response will guide them to the next action.
Step 6: Customize the Flow End
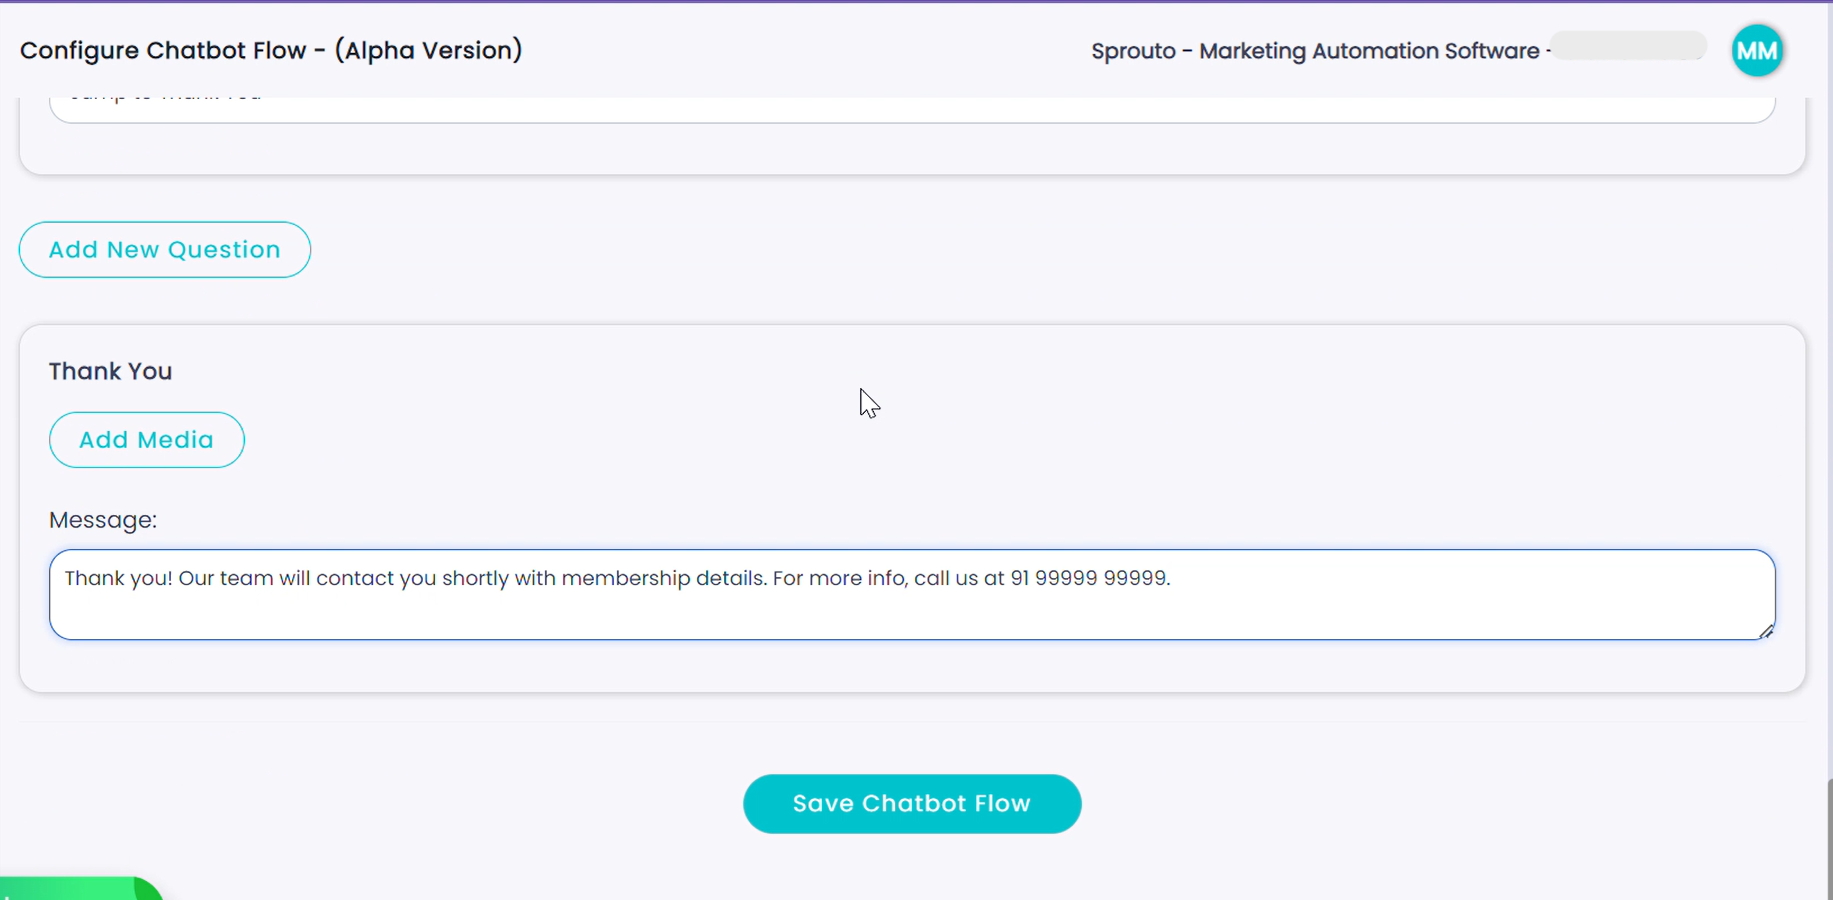
Once the interaction reaches the final message, you can add a thank you note or any final information.
Example: “Thank you! Our team will contact you shortly with membership details.”
Don’t forget to save your chatbot flow once the configuration is done.
Step 7: Review Your Chatbot Flow List
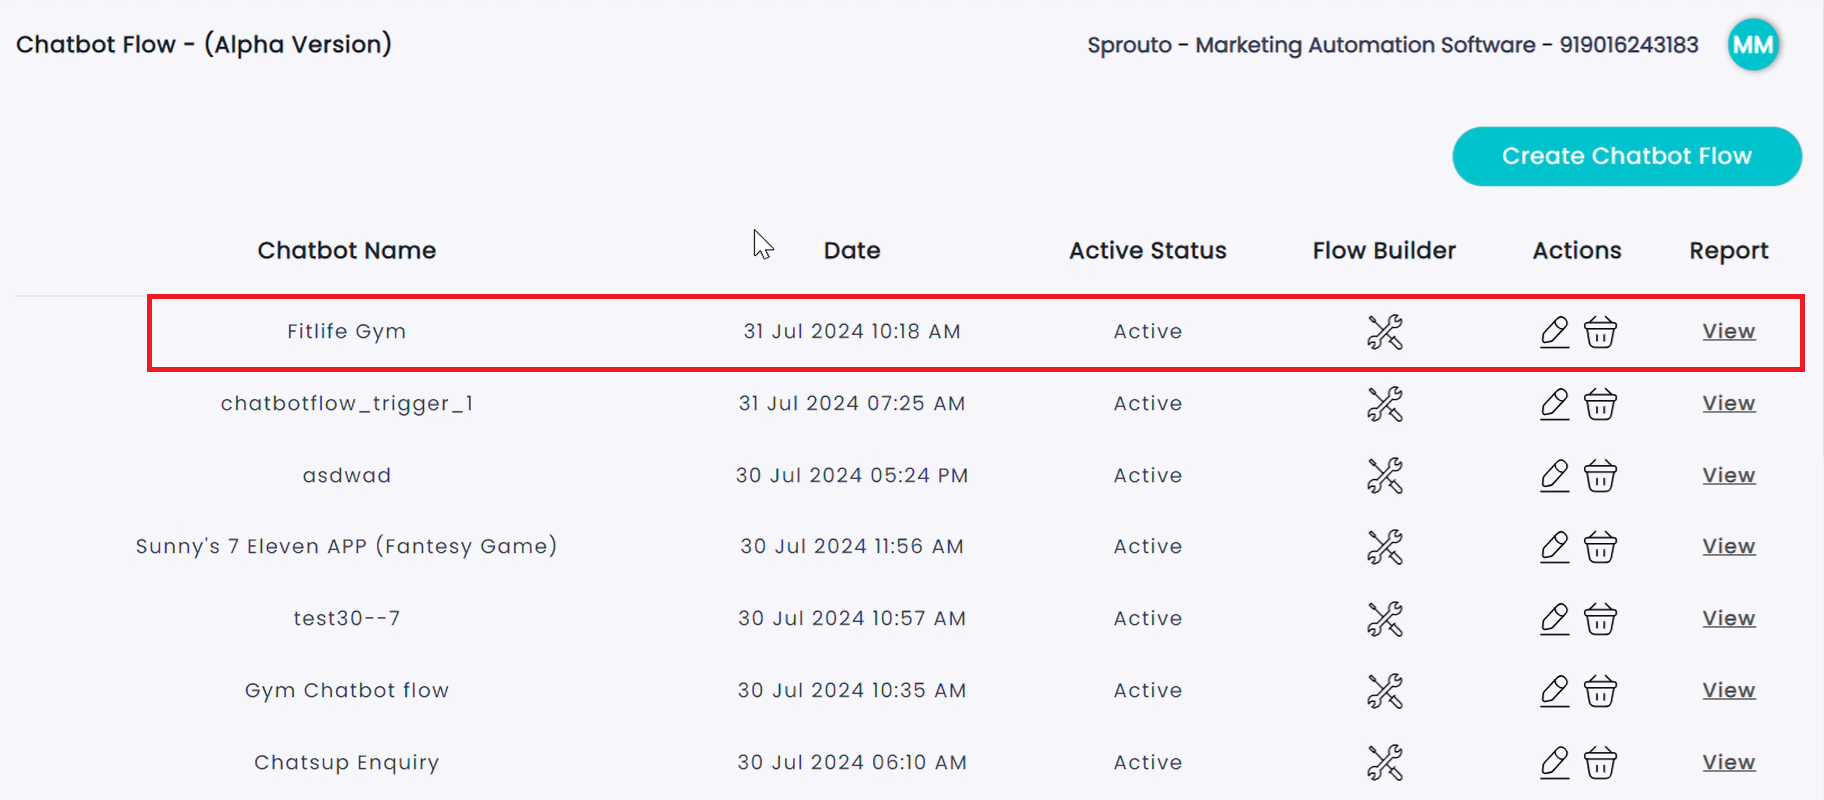
Once you’ve created your chatbot flow, it will appear in the Chatbot Flow list as shown in the last image.
In this case, the flow created is named FitLife Gym, and it shows as Active.
From this screen, you can view the details of the chatbot, edit the flow, or delete it by using the corresponding icons next to each chatbot flow.
Step 8: Test the WhatsApp Chatbot
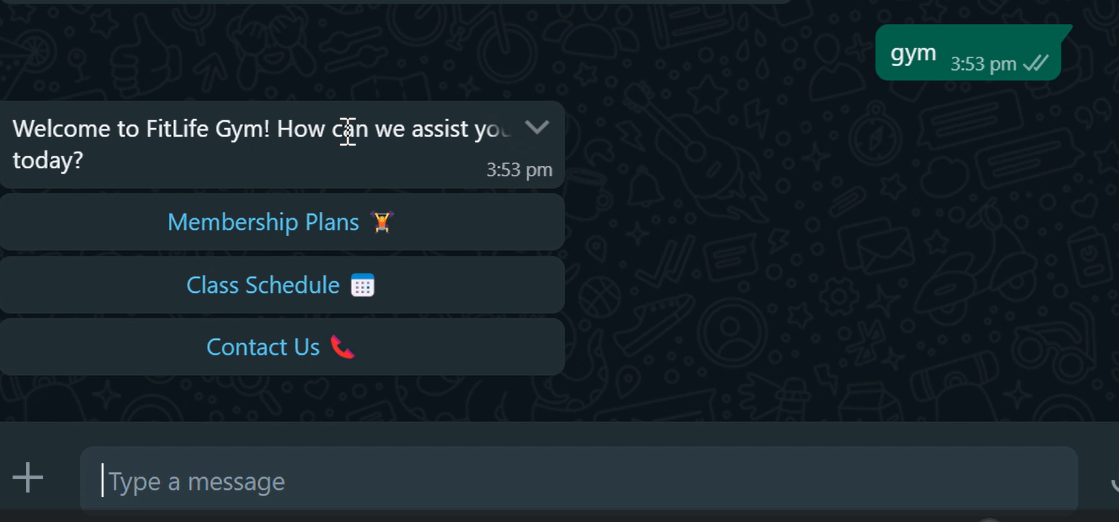
After activating the chatbot flow, test the WhatsApp chatbot by sending the defined trigger word (e.g., “gym”) from your WhatsApp chat.
The bot will immediately respond with the welcome message and options you configured earlier.
In the example above, it provides options like Membership Plans, Class Schedule, and Contact Us. These are presented as buttons that users can easily click on to proceed with their query.


