In this blog we will explore how we can use the Robofy chatbot to help your visitors connect with you across multiple channels like WhatsApp, Email, Meetings and FB Messenger.
Login to Robofy Dashboard:
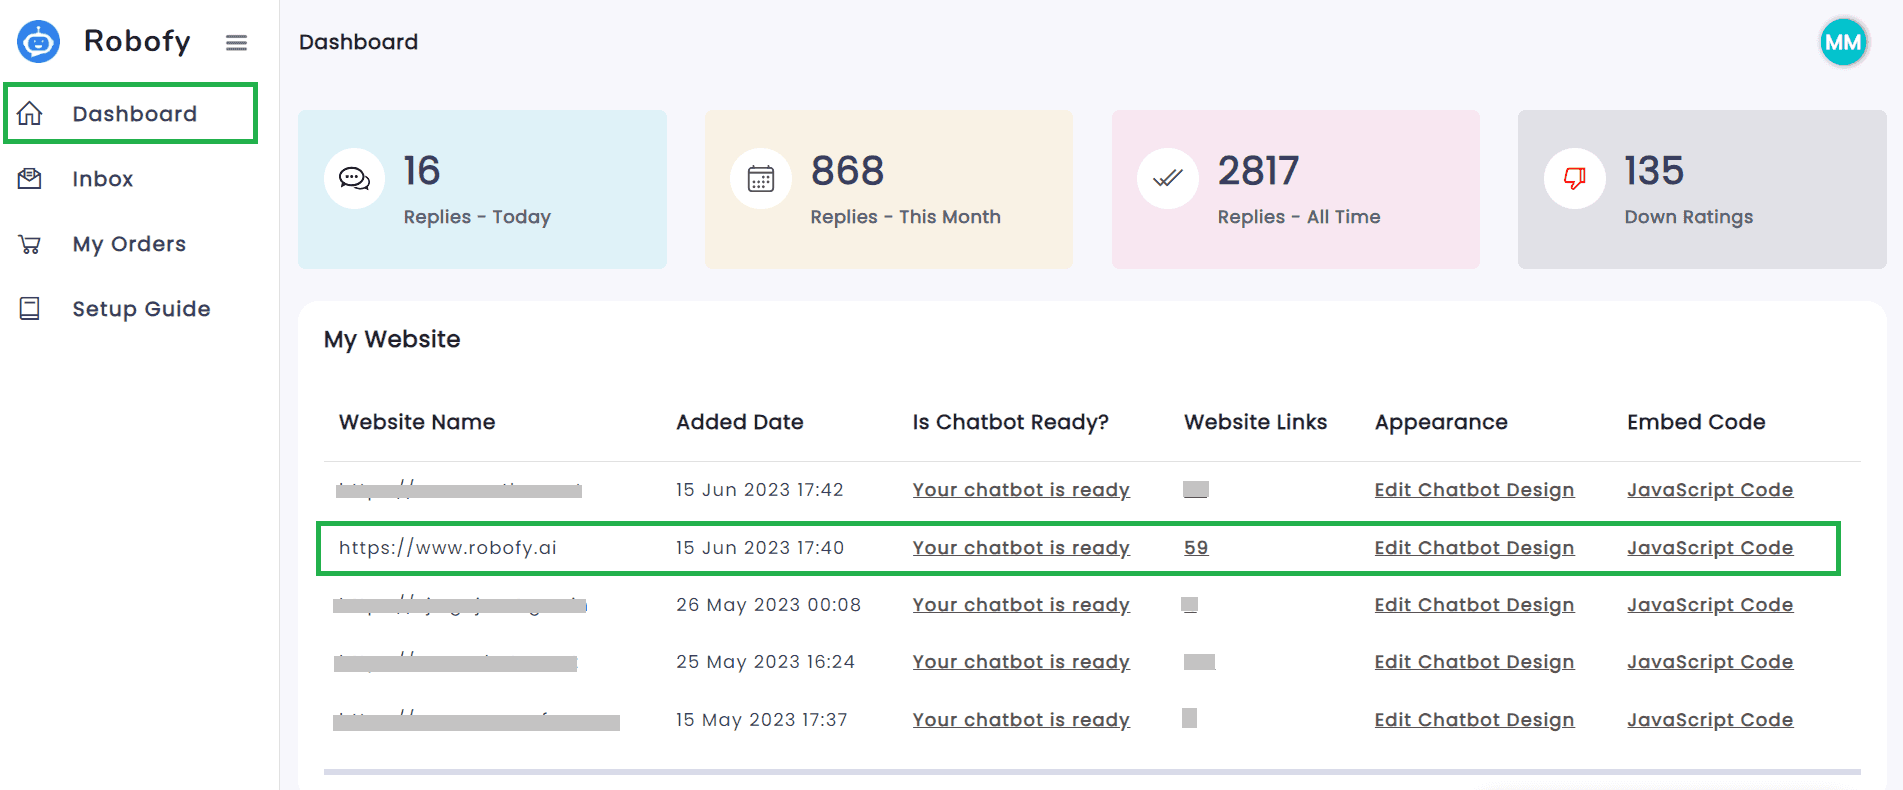
To enable all WhatsApp, FB, Email etc channels, we need to log in to www.robofy.ai and click on the “Edit chatbot design” button on the dashboard.
WhatsApp Integration:
You can seamlessly integrate WhatsApp with Robofy by following the given steps:
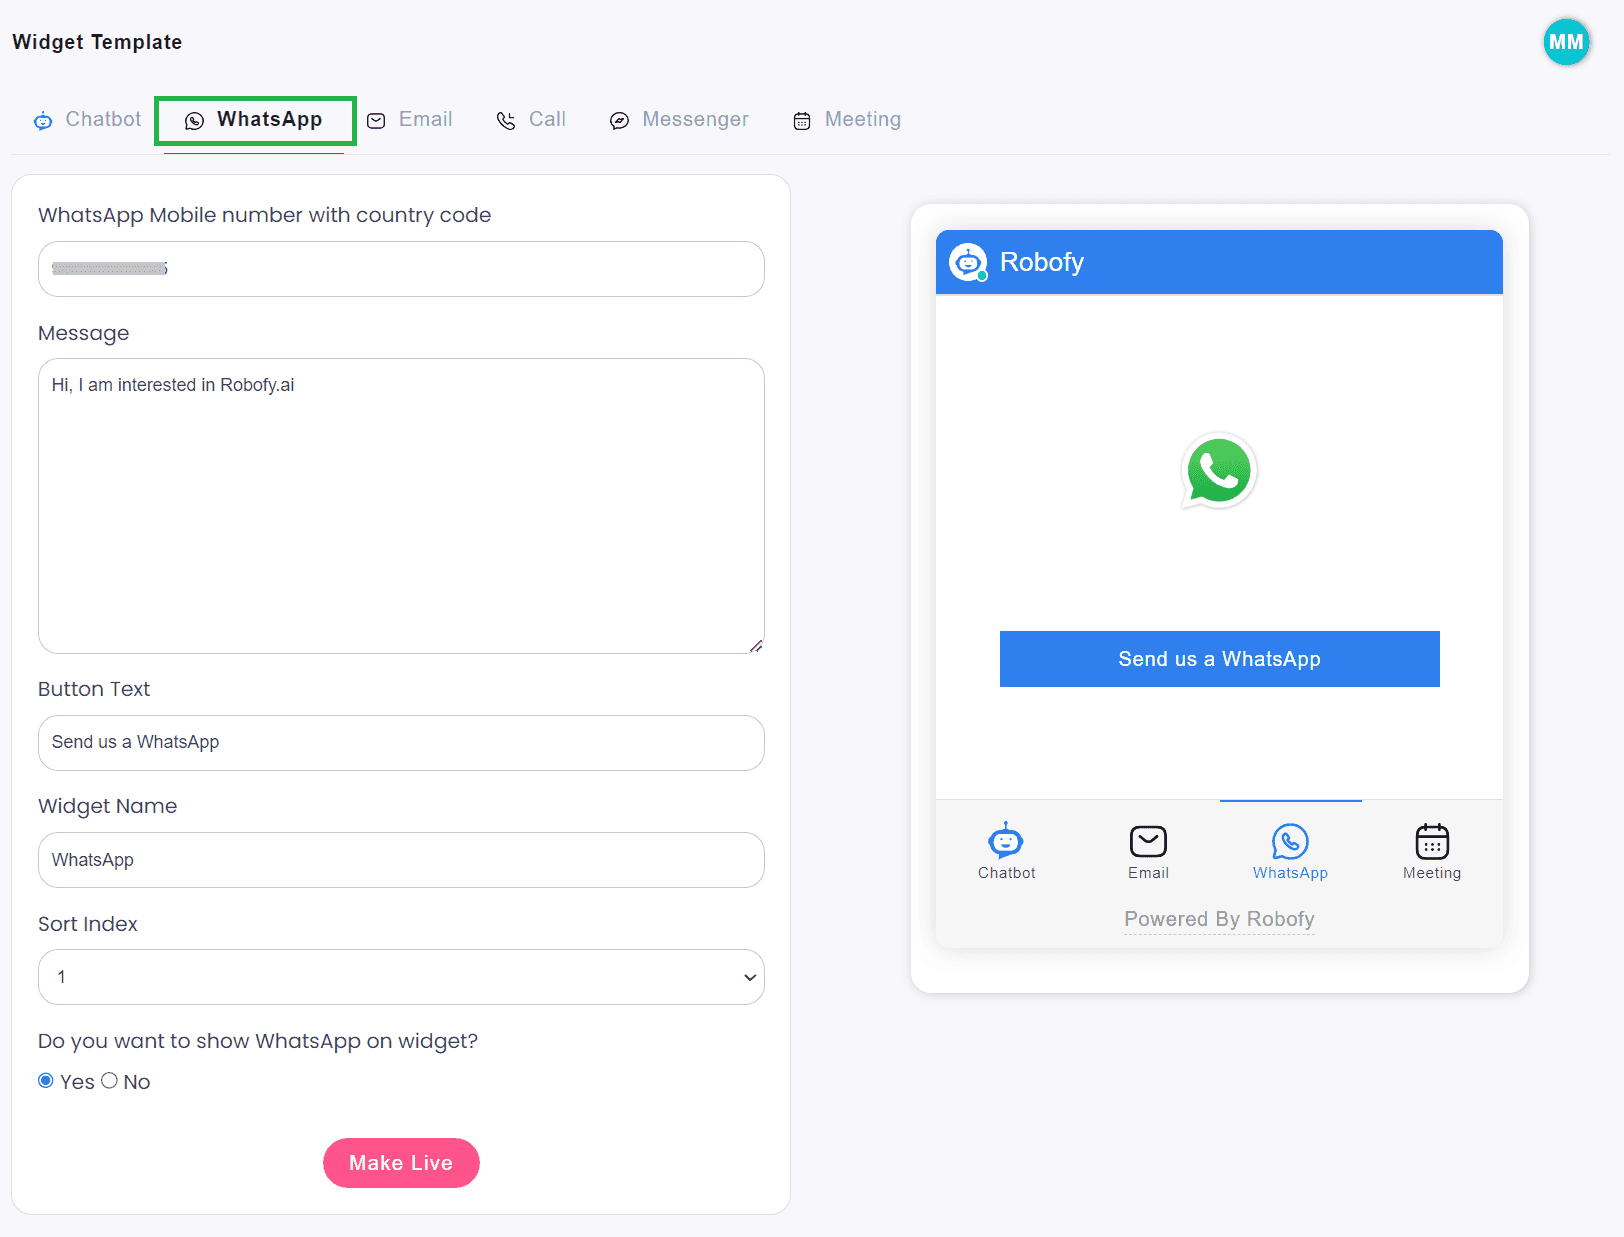
To integrate WhatsApp functionality, simply click on the WhatsApp tab as shown below. Add the desired phone number for customers to connect with. Customize the pre-typed message that customers can send. You can also add text to the button. Personalize the widget name according to your preference. Adjust the widget placement as needed. Enable or disable the widget on your chatbot screen. To apply your changes, use the “Make Live” button.
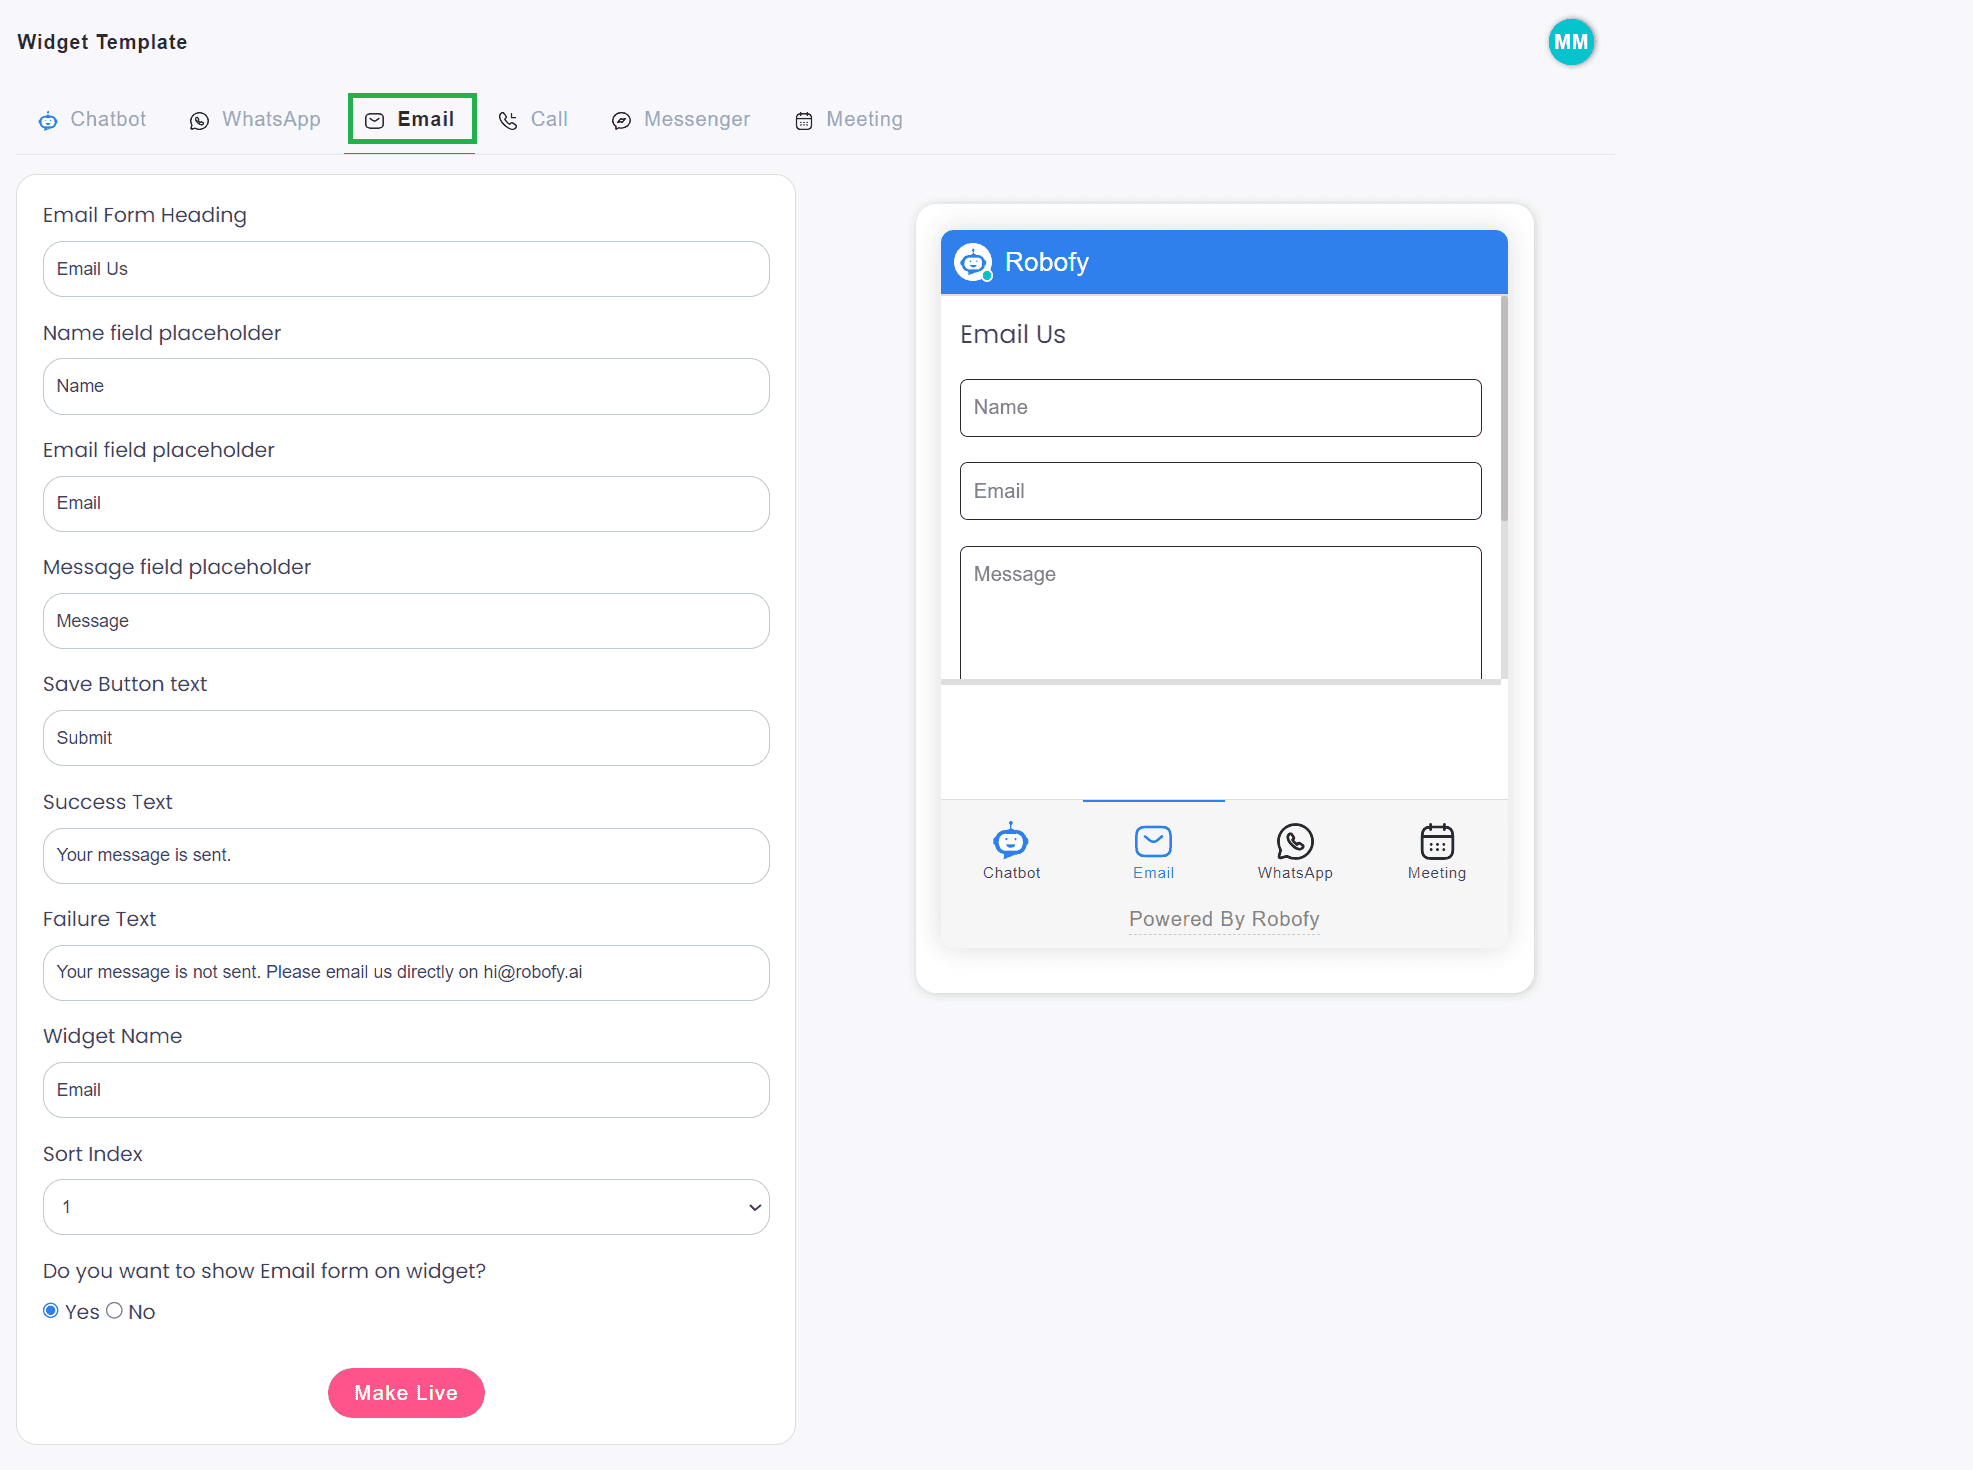
Email Integration:
To integrate Email functionality, access the Email tab and provide a Heading for customer engagement. Customize fields like Name, Email, and Message, along with the button content. You can add success or failure messages and personalize the widget name. Adjust widget placement as needed and enable or disable it on the chatbot screen. Apply changes using the “Make Live” button.
Meeting Integration:
You can easily integrate your Calendly, Zoom, and Google Meet links with Robofy by following the given steps:
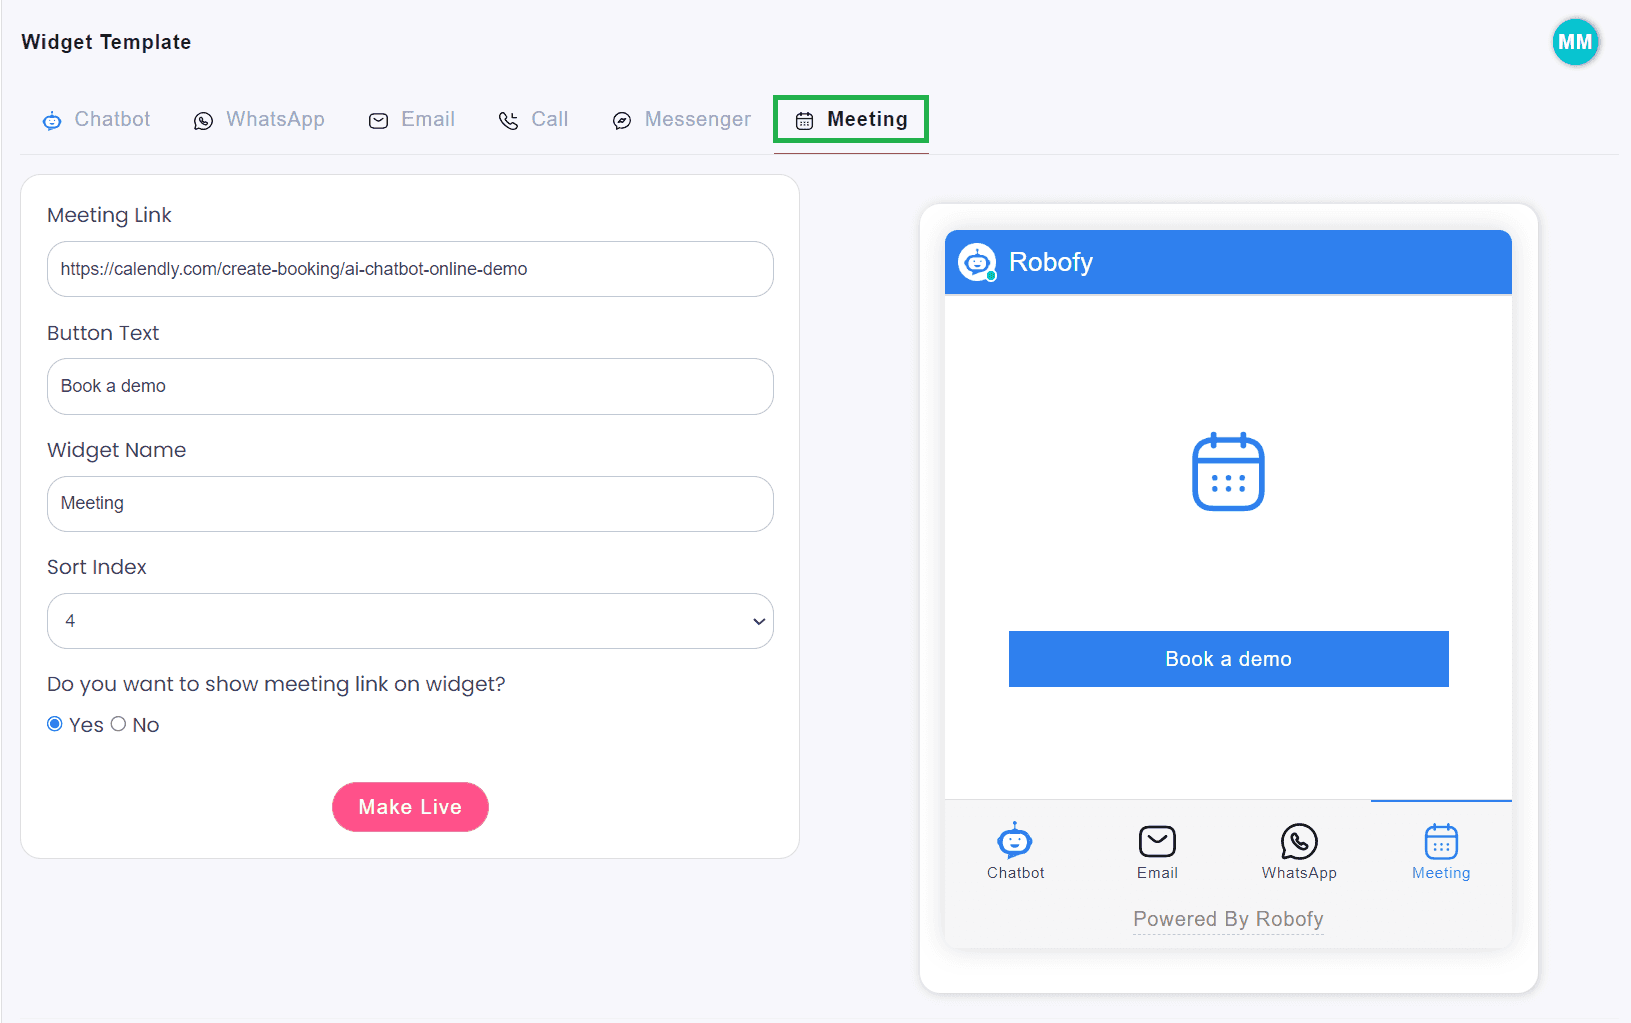
Click on the Meeting tab, shown below, and add the preferred meeting link for customer connectivity. Customize the button content to enhance the user experience. Personalize the widget name to your liking and adjust its placement as needed. You can easily enable or disable the widget on your chatbot screen. Once you’re satisfied with the changes, simply click the “Make Live” button to apply them. These straightforward instructions ensure a seamless integration of the Meeting feature, allowing you to efficiently manage appointments and optimize communication with your customers.
