Configuring your AI chatbot properly is crucial for delivering an optimal user experience. In this guide, we’ll walk you through the process of editing your chatbot’s advanced settings, specifically focusing on the main settings. Let’s dive in and understand what each field in the advanced settings is about.
Contents
Step-by-Step Guide to Accessing Advanced Settings
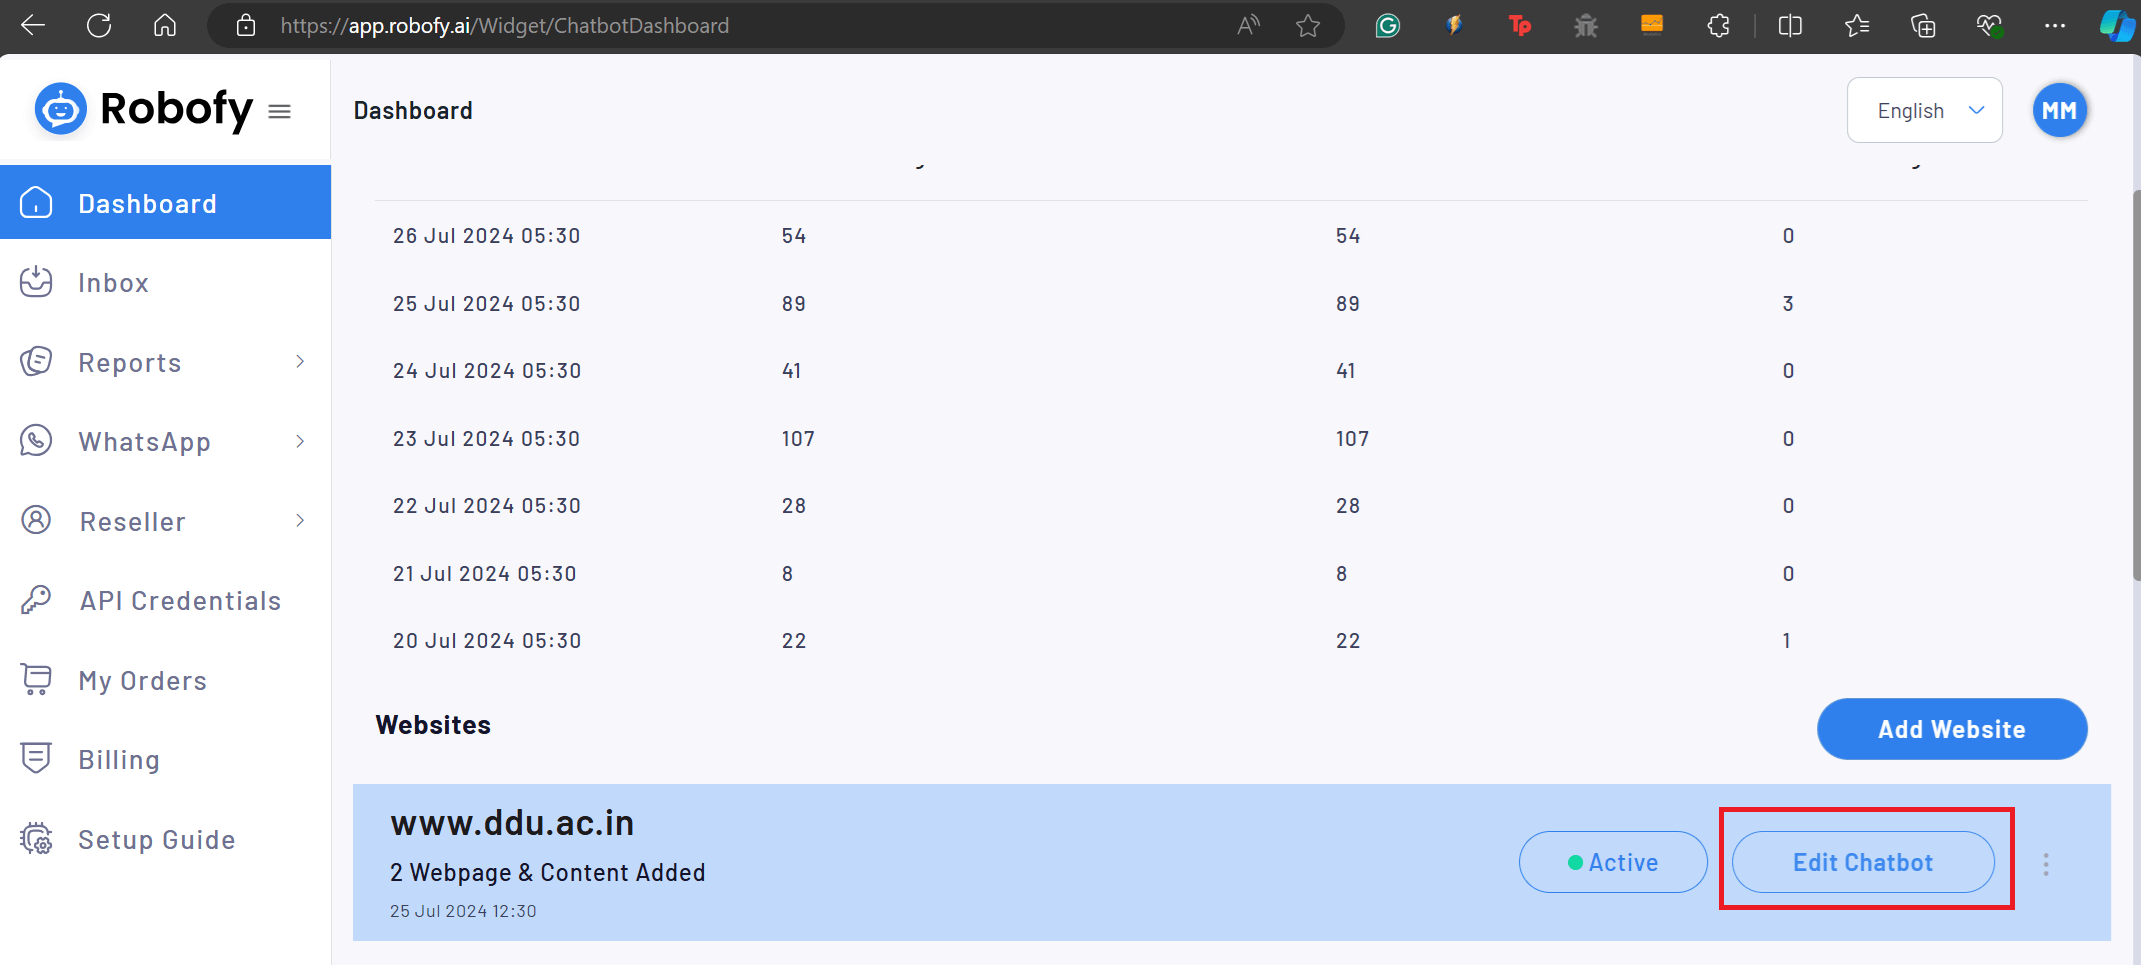
- Go to Edit Chatbot: Begin by navigating to the chatbot you want to configure. Click on the edit chatbot option to access the customization menu in app.robofy.ai .
- Advance Setting: Once you’re in the edit mode, locate and click on the ‘Advanced Setting’ option. This section contains various fields that allow you to fine-tune your chatbot’s functionality and appearance.
Understanding Main Settings Fields
- Let’s break down the fields in the Main Settings section:
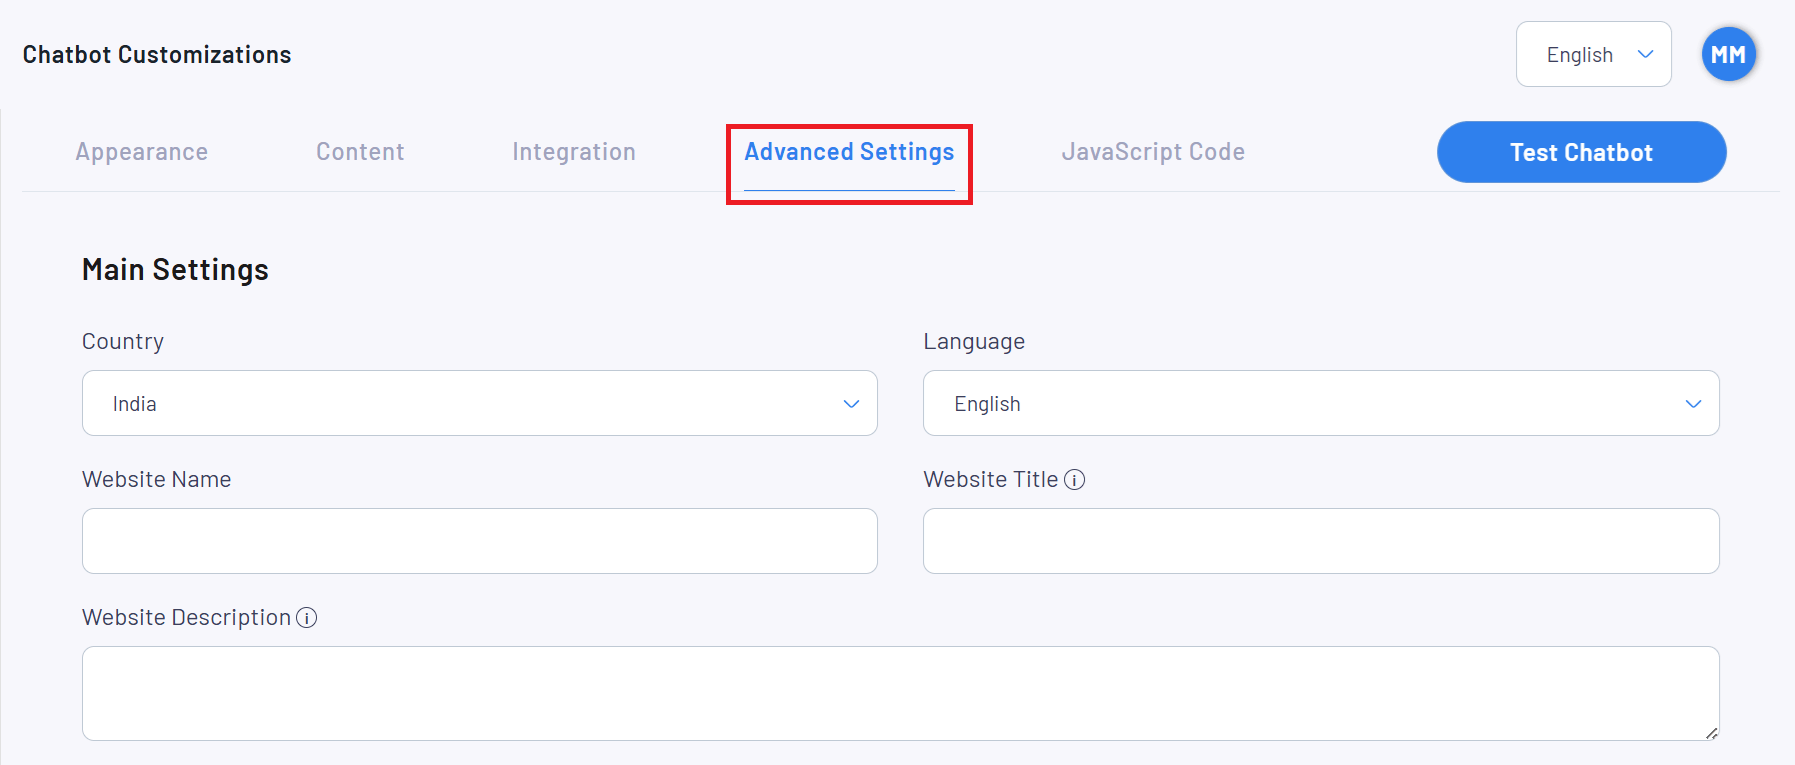
- Country
- Example Value: India
- Purpose: This field specifies the country where your chatbot will primarily be used. Setting the correct country helps in tailoring the chatbot’s responses and features to the local audience, such as handling country-specific queries, following local norms, and using appropriate regional language nuances.
- Language
- Example Value: English
- Purpose: This field determines the primary language in which the chatbot will communicate. Setting the language to English ensures that the chatbot interacts with users in English, making it accessible to a wide audience. If your target audience speaks a different language, you can select the appropriate option here.
- Website Name
- Purpose: This is the name of your website as it will appear in the chatbot interface. It’s important to set this accurately as it helps in branding and makes your chatbot recognizable to users. The website name should be concise and reflective of your brand or business.
- Website Title
- Purpose: The website title is a brief description or tagline that appears along with the website name. It gives users an immediate understanding of what your website is about. For instance, if your website name is ‘Tech Solutions’, your website title might be ‘Innovative IT Services’.
- Website Description
- Purpose: This field allows you to provide a more detailed description of your website. It can include your mission, services, or any other information that helps users understand your website’s purpose. A well-crafted website description enhances user engagement by clearly conveying what your website offers.
Additional Settings for Enhanced User Experience
- Beyond the main settings, there are several additional settings that can further enhance the user experience:
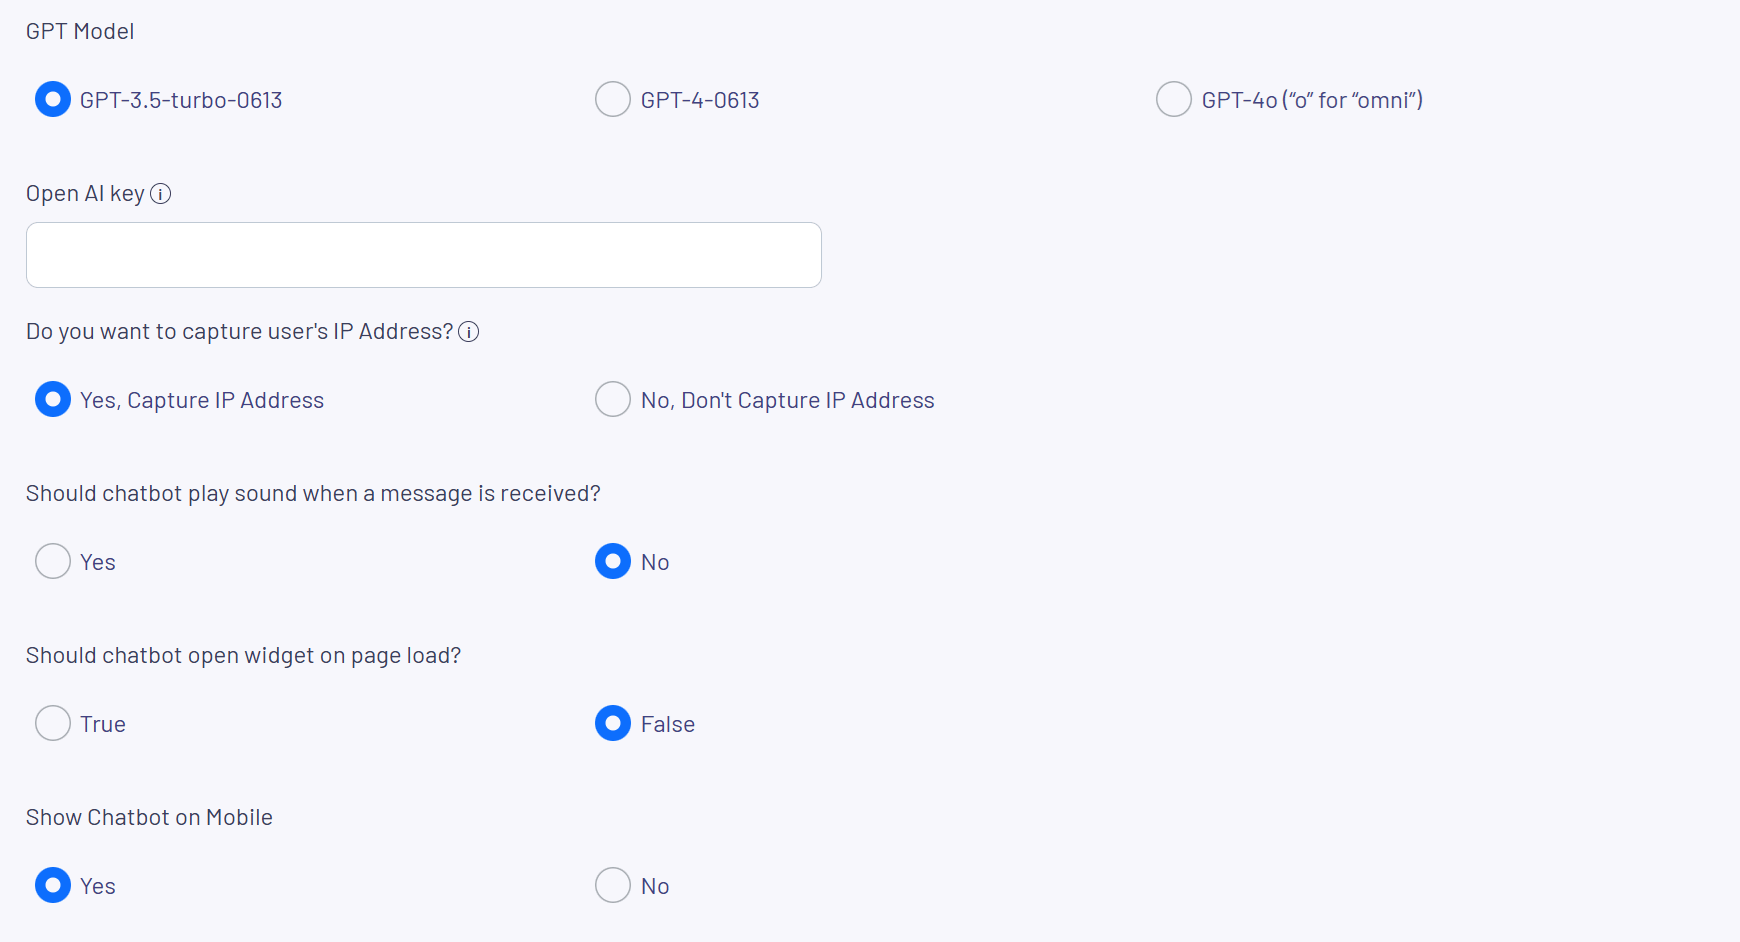
- GPT Models: Enhancing Chatbot Performance
- When configuring your chatbot, choosing the right model is crucial for achieving the desired performance and user interaction quality. Here are some of the most advanced models available:
- GPT-3.5-turbo-0613
- Overview: This model is an enhanced version of GPT-3, offering improved accuracy and response times. It is well-suited for general-purpose applications and can handle a wide variety of tasks effectively.
- GPT-4-0613
- Overview: As an advanced iteration of the GPT series, GPT-4 provides even better language understanding and generation capabilities. It is ideal for more complex tasks and scenarios requiring high precision and nuanced understanding.
- GPT-4o (“o” for “omni”)
- Overview: GPT-4o is designed to be an all-encompassing model that combines the best features of previous versions. It excels in providing versatile and comprehensive responses, making it perfect for applications needing broad and deep conversational abilities.
- Open AI Key
- Purpose: This field is used to enter the API key for integrating OpenAI’s language models into your chatbot. This key is essential for enabling advanced AI functionalities.
- Capture User’s IP Address
- Options: Yes, Capture IP Address | No, Don’t Capture IP Address
- Purpose: This setting allows you to choose whether to capture the IP addresses of users interacting with your chatbot. Capturing IP addresses can help in personalizing responses based on location and improving security.
- Play Sound When a Message is Received
- Options: Yes | No
- Purpose: Enabling this setting allows the chatbot to play a sound whenever a new message is received. This can improve user engagement by providing an audible alert.
- Open Widget on Page Load
- Options: True | False
- Purpose: This setting determines whether the chatbot widget should open automatically when the page loads. Setting this to true can immediately draw the user’s attention to the chatbot.
- Show Chatbot on Mobile
- Options: Yes | No
- Purpose: This setting allows you to choose whether the chatbot should be visible on mobile devices. Ensuring the chatbot is available on mobile can enhance accessibility and reach a broader audience.
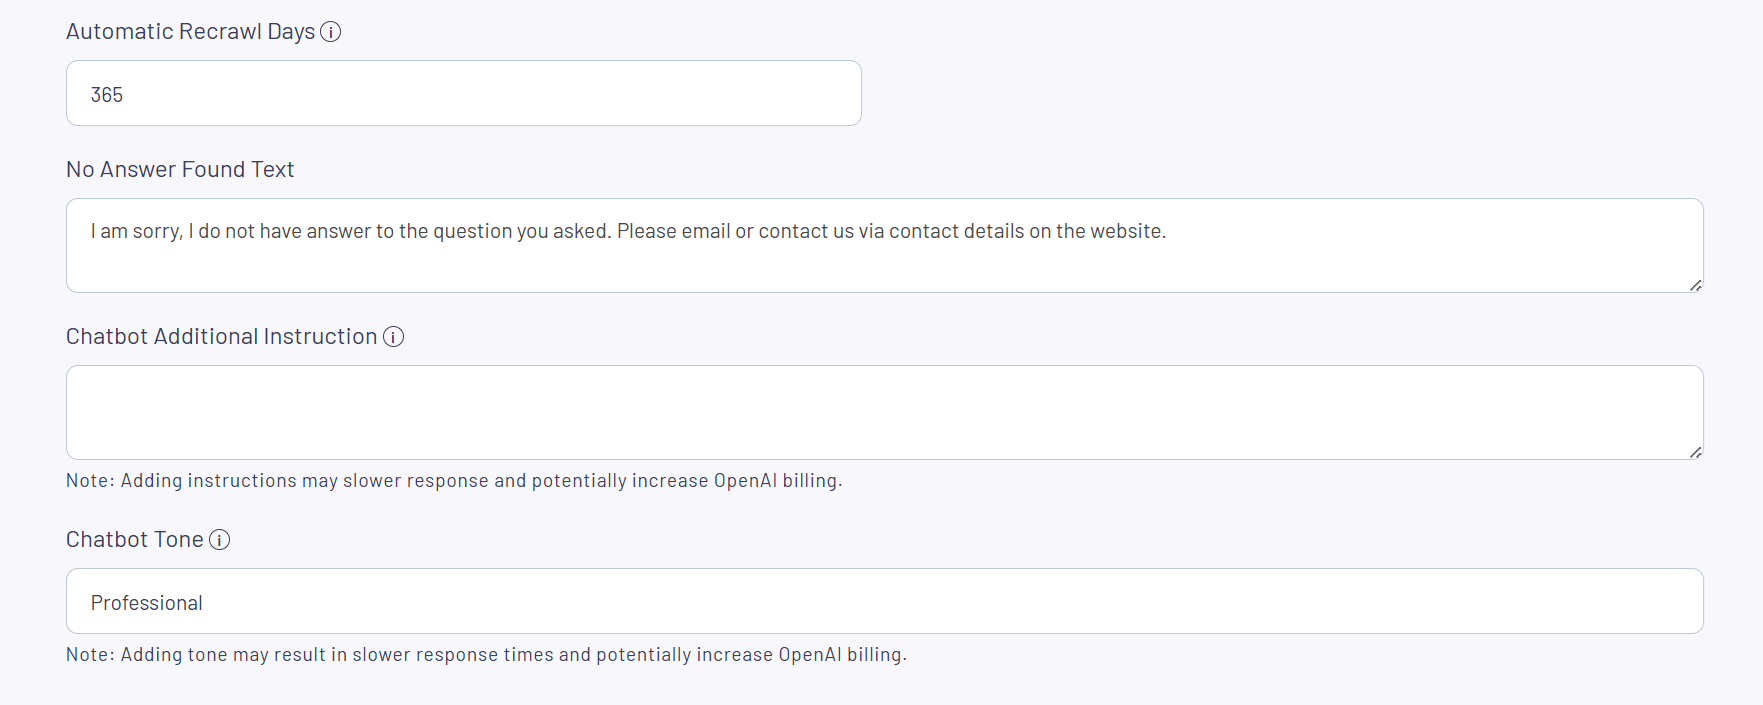
- Automatic Recrawl Days
- Example Value: 365
- Purpose: This field specifies the interval in days for the chatbot to automatically recrawl and update its knowledge base. Setting this to 365 means the chatbot will refresh its data once a year, ensuring that the information it provides remains up-to-date.
- No Answer Found Text
- Example Value: I am sorry, I do not have an answer to the question you asked. Please email or contact us via the contact details on the website.
- Purpose: This message is displayed when the chatbot cannot find an answer to a user’s question. Providing a polite and informative message helps maintain a positive user experience even when the chatbot cannot assist directly.
- Chatbot Additional Instruction
- Purpose: Here, you can add specific instructions for the chatbot to follow. However, be aware that adding instructions might slow down response times and potentially increase OpenAI billing.
- Chatbot Tone
- Example Value: Professional
- Purpose: This setting allows you to define the tone of the chatbot’s responses. Setting the tone to ‘Professional’ ensures that the chatbot communicates in a formal and respectful manner. Note that specifying a tone can also slow down responses and potentially increase OpenAI billing.
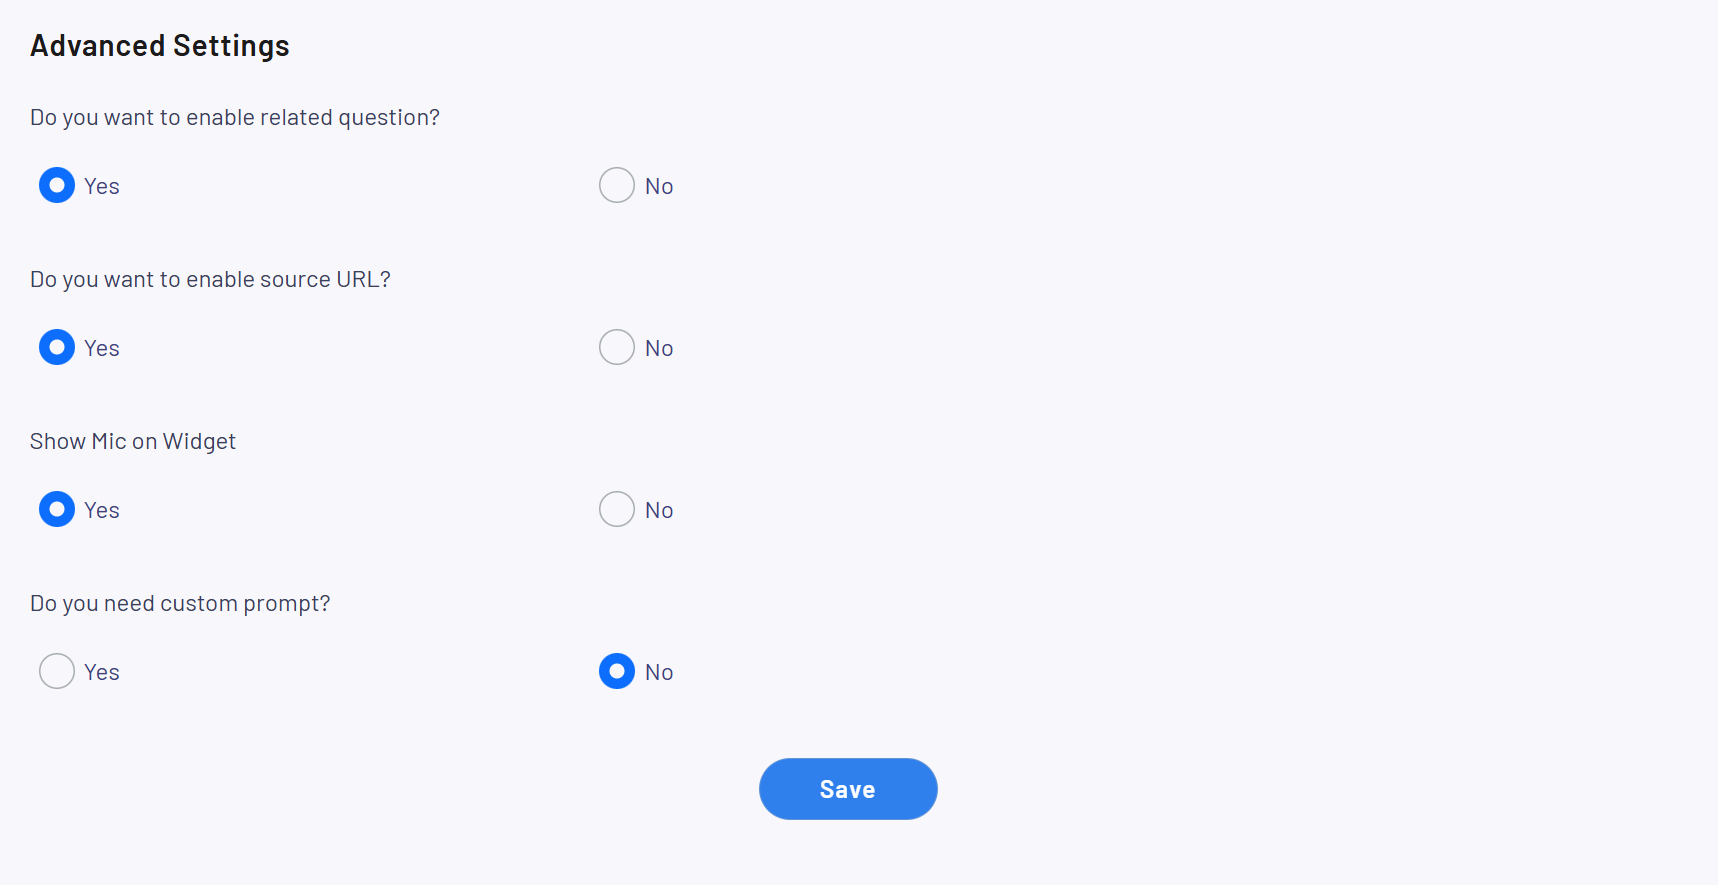
- Enable Related Questions
- Options: Yes | No
- Purpose: This setting allows the chatbot to suggest related questions to users, enhancing engagement by providing additional relevant information and keeping the conversation going.
- Enable Source URL
- Options: Yes | No
- Purpose: This option enables the chatbot to provide source URLs for the information it shares, adding a layer of credibility and allowing users to verify the information from its original source.
- Show Mic on Widget
- Options: Yes | No
- Purpose: This setting enables the microphone icon on the chatbot widget, allowing users to interact with the chatbot using voice commands. This can enhance user experience, particularly for mobile or accessibility-focused use cases.
- Need Custom Prompt
- Options: Yes | No
- Purpose: This setting allows you to provide a custom prompt for the chatbot, guiding its initial responses or setting a specific context for interactions. Like additional instructions, custom prompts may slow response times and potentially increase OpenAI billing.
Configuring the advanced settings of your AI chatbot is a critical step in ensuring it performs optimally and meets user expectations. By understanding and properly setting each field in the Main Settings and additional settings, you can enhance the functionality and user experience of your chatbot.

