Contents
Step 1: Choosing a Predefined Template Category
The first step in creating your chatbot flow is selecting the appropriate category that aligns with your use case. As seen in the updated image, the platform provides various predefined categories for chatbot templates, including:
- Lead Generation
- Appointment Booking
- Customer Service
- Feedback Collection
- Real Estate Chatbot
- Restaurant Chatbot
- HR Chatbot
- AI Chatbot for E-commerce
- Healthcare Chatbot etc.
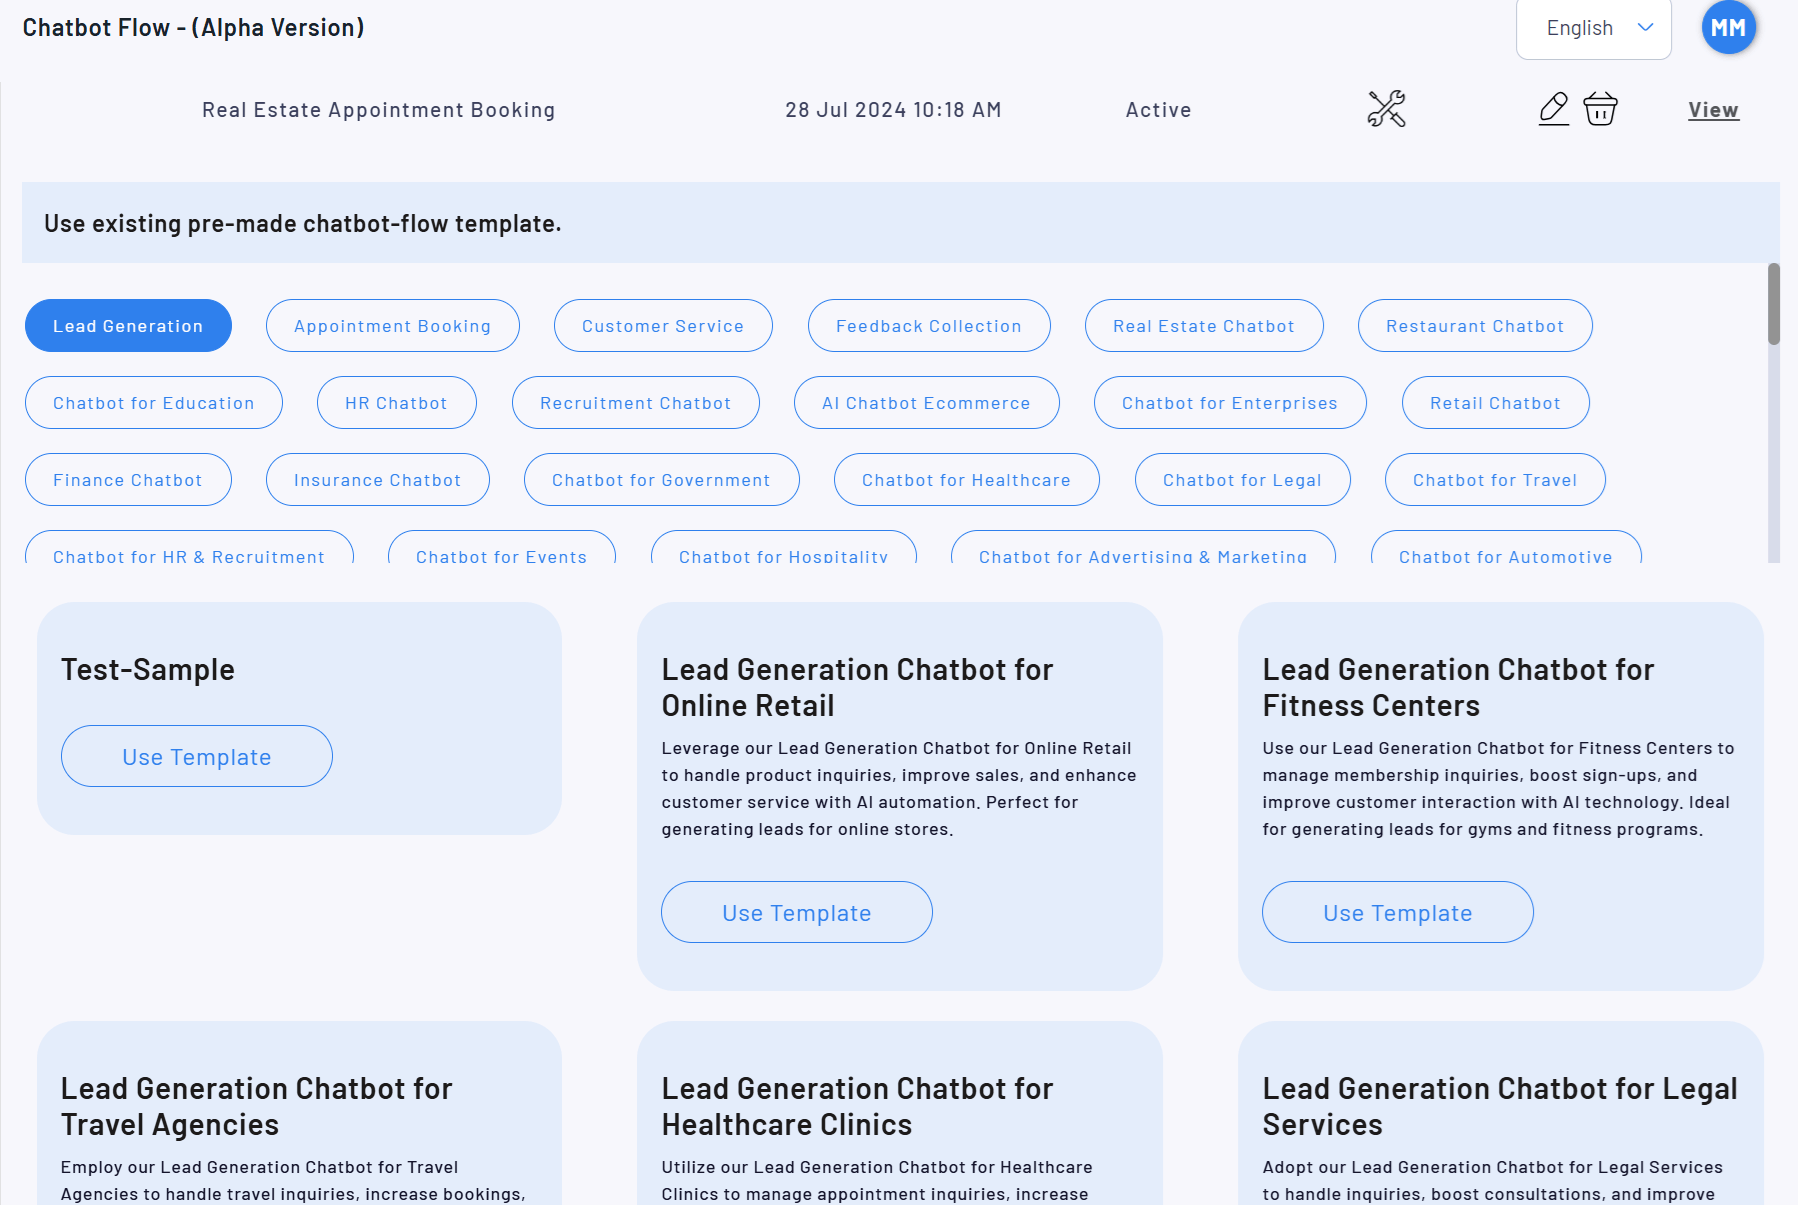
Each category is designed to meet the needs of different industries. You can choose a category depending on the type of interaction you want to automate. For instance, if you need a chatbot for Lead Generation, you would select that category to access pre-built templates that handle product inquiries, gather contact information, and help convert visitors into leads.
Once you’ve chosen the right category, you can select the corresponding template, which brings us to the next step.
Step 2: Selecting a Specific Template
After selecting a category, you can browse through the available templates. As demonstrated in the previous image, there are various options available within the Lead Generation category:
- Lead Generation Chatbot for Online Retail: Ideal for product inquiries and enhancing customer service in online retail environments.
- Lead Generation Chatbot for Travel Agencies: Tailored for handling travel inquiries, booking services, and promoting travel packages.
- Lead Generation Chatbot for Fitness Centers: Designed to handle membership inquiries and improve engagement for gyms and fitness programs.
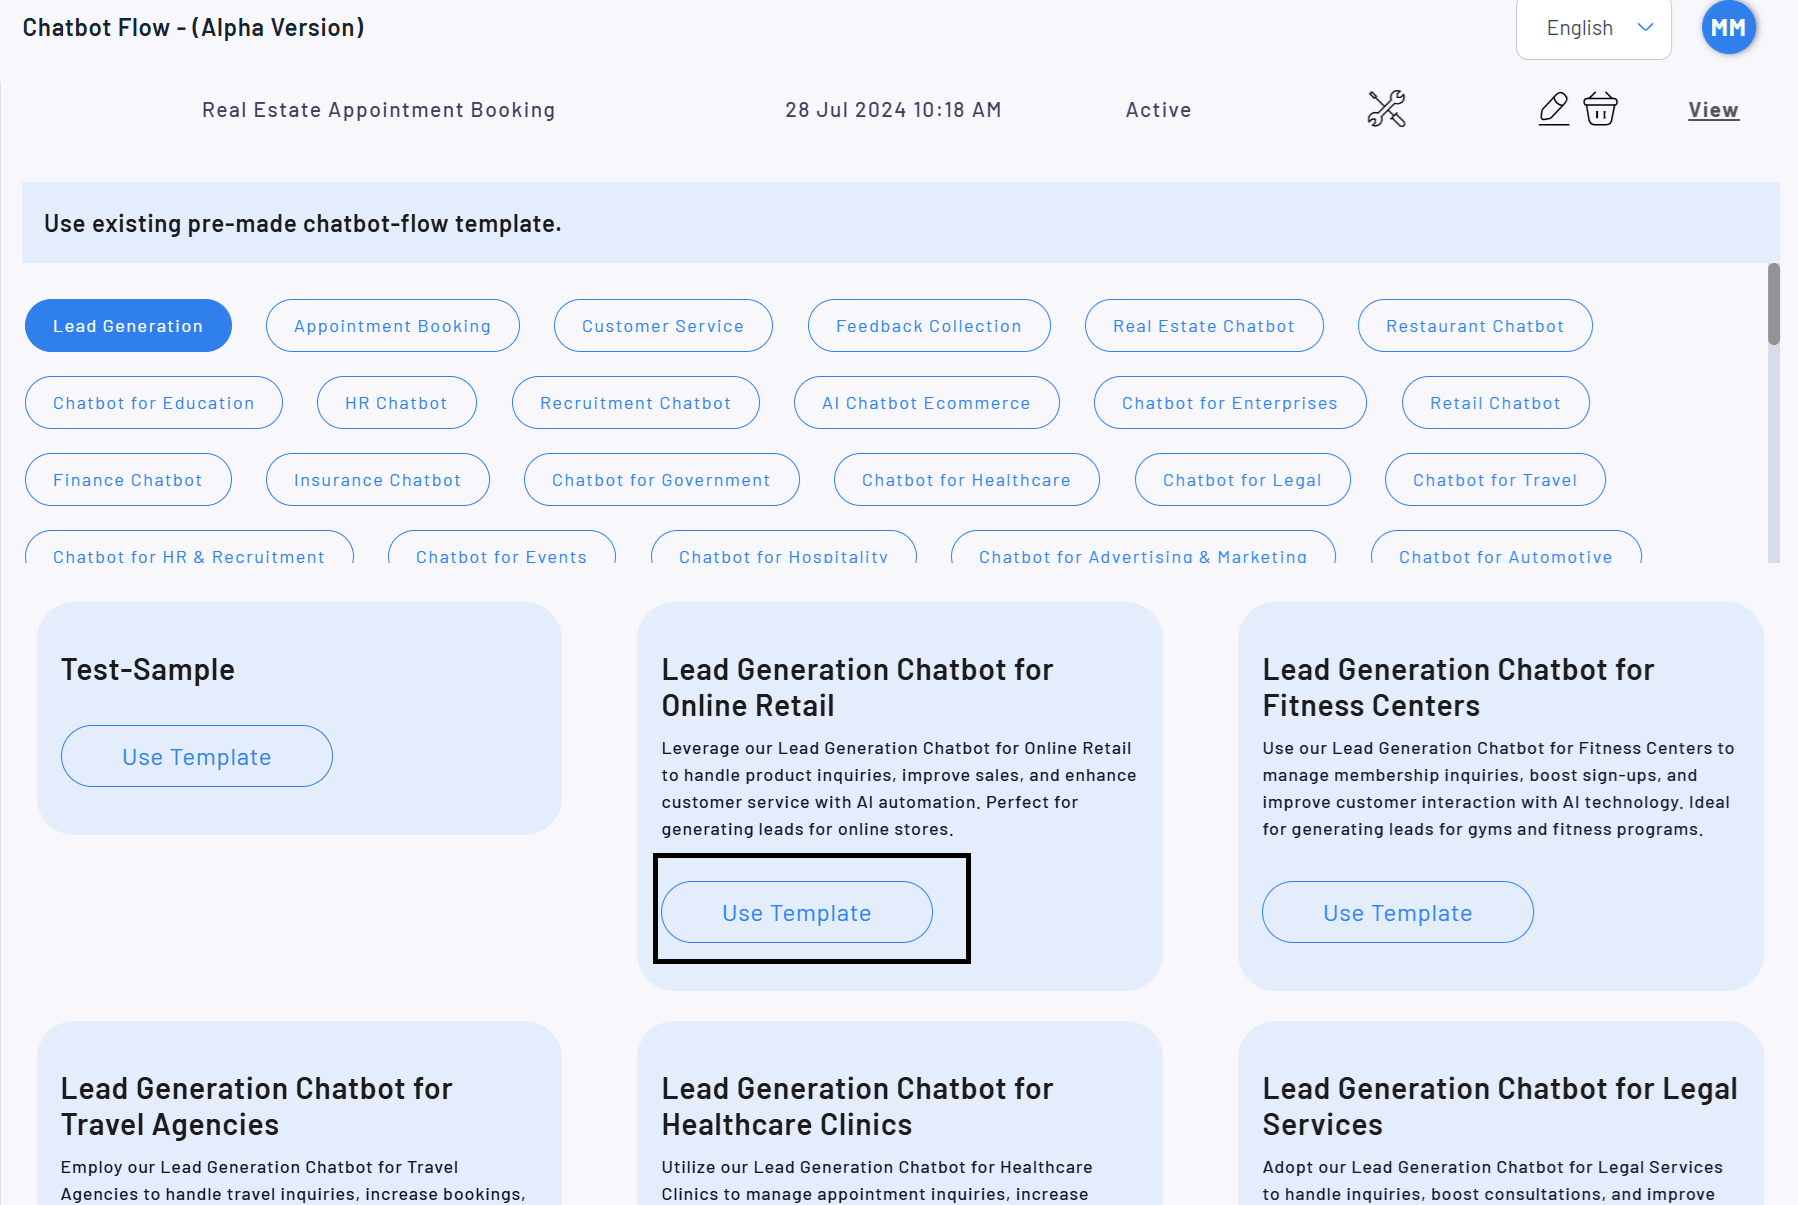
To proceed, click the Use Template button on the template that best fits your requirements.
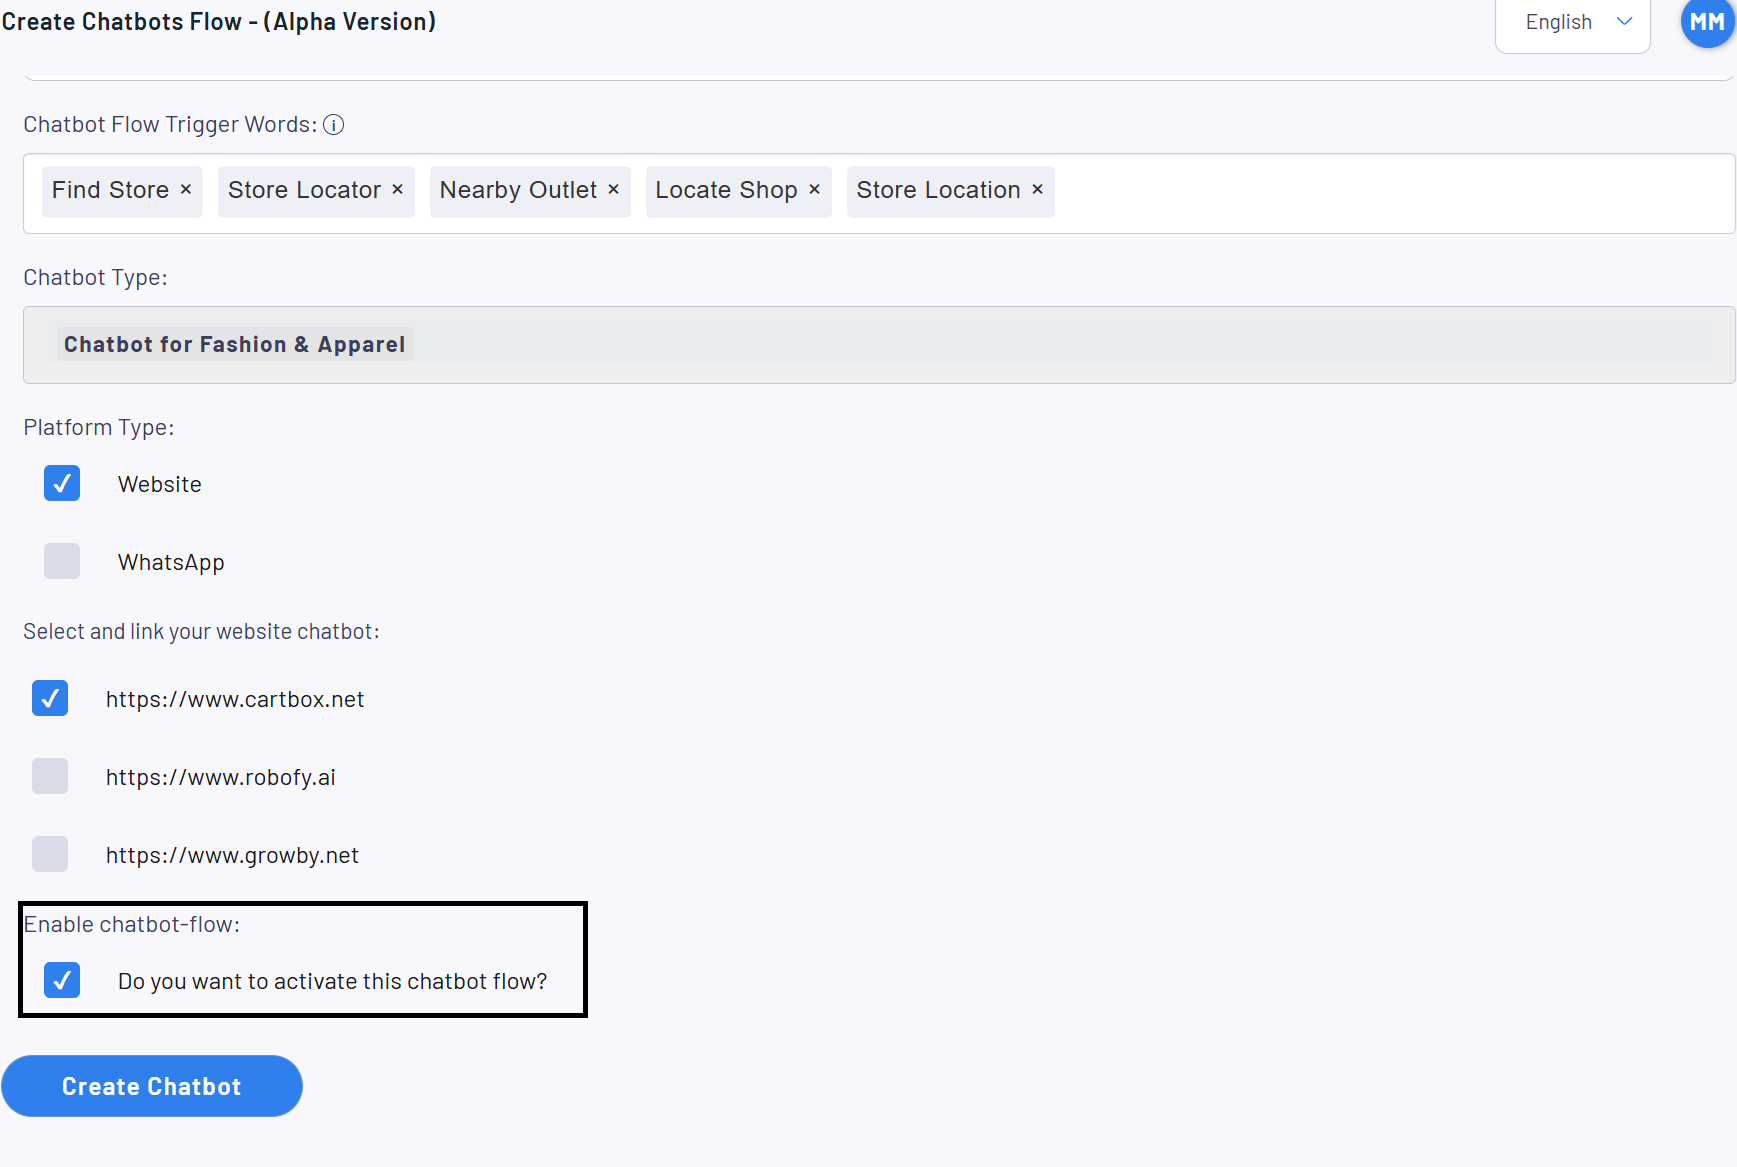
Step 3: Setting Trigger Words
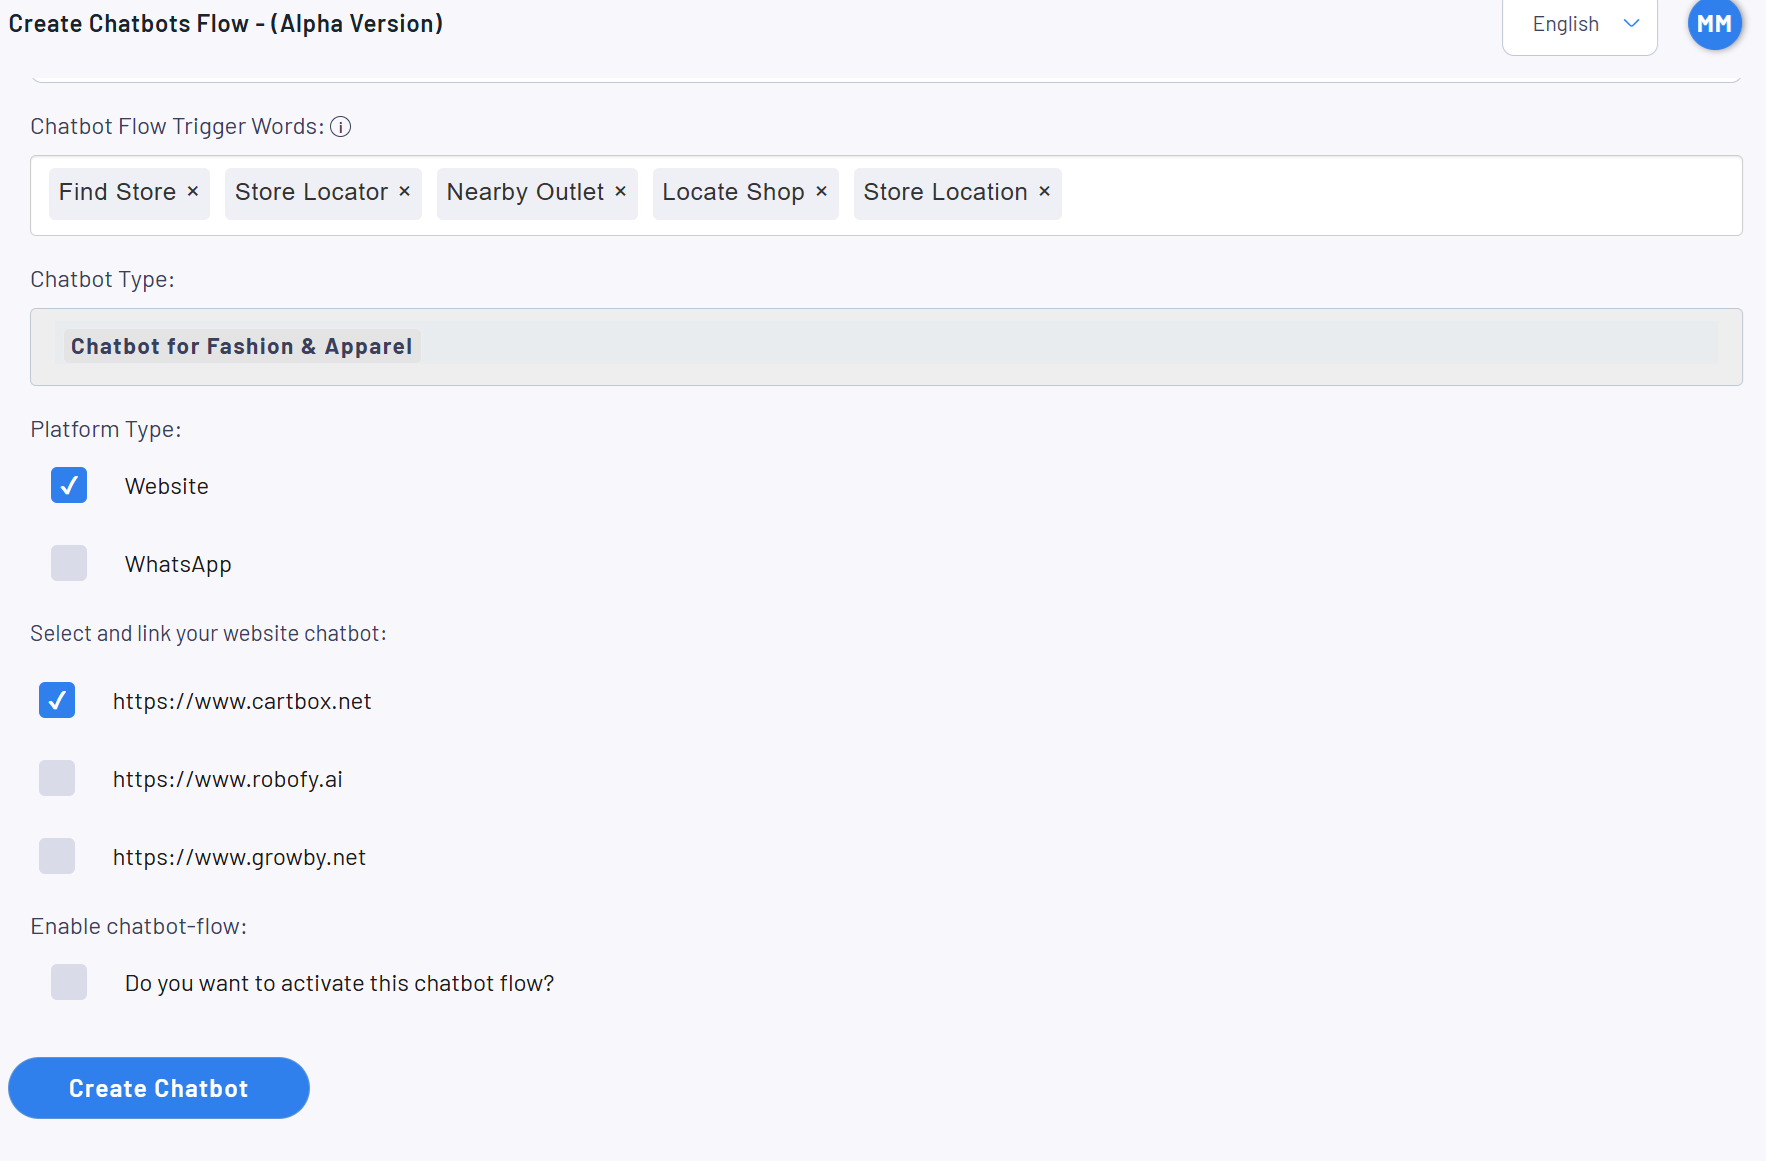
Next, set up the trigger words that will activate your chatbot. These are words or phrases that a user might type, prompting the chatbot to begin the conversation. For a store locator chatbot, you might set trigger words like:
- Find Store
- Store Locator
- Locate Shop
- Store Location
By setting these trigger words, you ensure that the chatbot engages only when the user query is relevant.
Step 4: Linking the Chatbot to Your Platform
Once your chatbot flow is defined, it’s time to choose where this chatbot will be deployed. You can link the chatbot to platforms such as your website or WhatsApp. For example, if you’re activating the chatbot for your online retail website, you can select the website platform checkbox and link the chatbot to your site
Step 5: Finalizing the Chatbot Flow
After linking your chatbot to the platform and configuring the trigger words, the final step is to activate it. Review all the configured elements, ensure the flow steps are correct, and click the Create Chatbot button to finalize the setup.
Once activated, your chatbot will be live and ready to engage with users, automating tasks and improving your customer experience.
Step 6: Accessing the Chatbot Flow Builder
To begin, navigate to the chatbot flow builder. Here, you can create a series of automated questions that form the backbone of your chatbot’s conversation with users.
From the interface, click the “Add Question” button as shown in the image, which will open the question configuration screen, allowing you to define the user interaction flow.
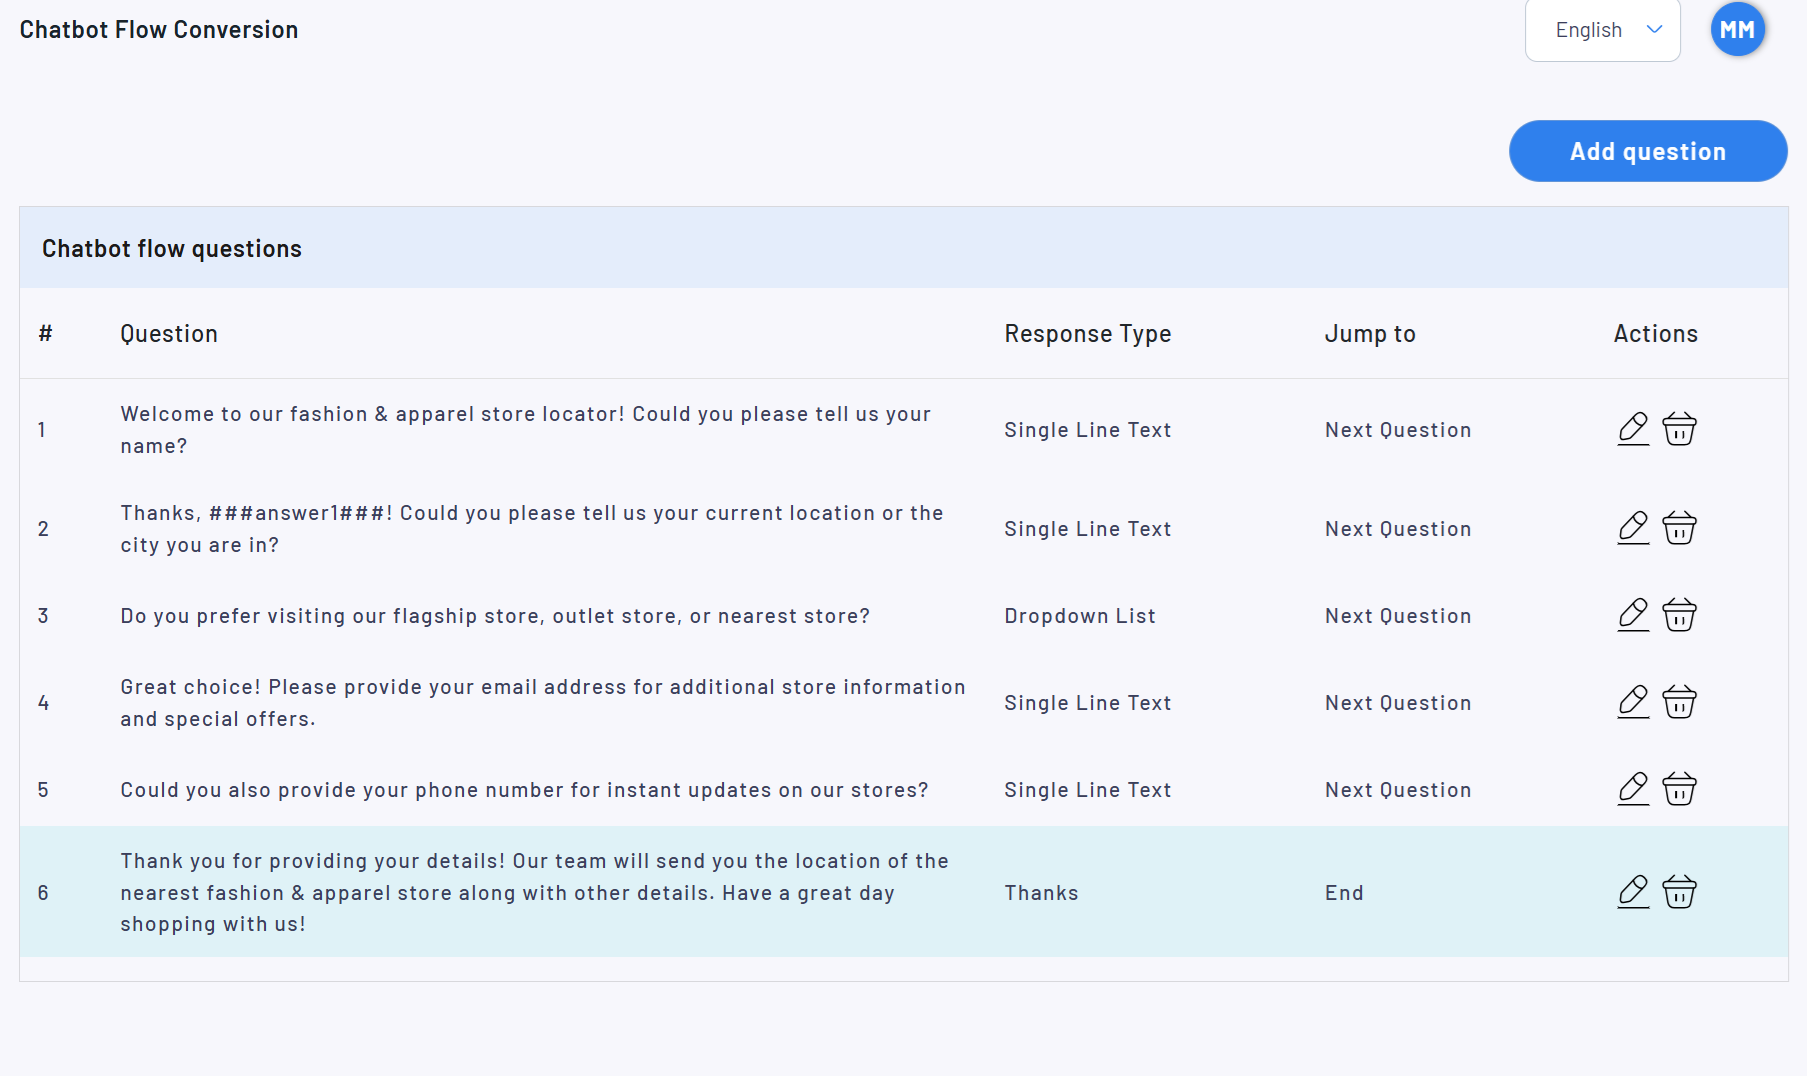
Step 7: Configuring Each Question
In the chatbot flow builder, you can customize the questions to align with your desired user interaction flow. The first question will typically be a greeting or an introductory message. As demonstrated in the example:
- Question/Message: “Welcome to our fashion & apparel store locator! Could you please tell us your name?”
- Response Type: For this question, you can select “Single Line Text” to receive a direct answer (e.g., the user’s name).
- Next Step: You can configure where the flow should go next. In this case, you want to move to the next question after the user responds.

Conclusion
Using predefined chatbot templates can significantly reduce setup time and provide a solid foundation for automating customer interactions. By following these steps, you can quickly create a chatbot that fits your business needs—whether it’s for lead generation, customer service, or appointment booking. With minimal effort, your chatbot will be up and running, ready to engage users and improve customer satisfaction.
.


